Crust
documentation version 1.2.0
Introduction
First of all, Thank you so much for purchasing this theme and for being our loyal customer. You are awesome!
You are entitled to get free lifetime updates to this product + exceptional support from the author directly, please do not forget to rate the Theme and We'll be waiting for your
Feedback. It would be nice to see your comments on our product.
This documentation is to help you regarding each step of customization. Please go through the documentation carefully to understand how this theme works and how to use it's components properly. No Coding knowledge is required to customize this theme. You will find everything is easy to use, customize and even to change, We did our best to make this documentation as clear as possible.
Requirements#back to top
Crust WordPress Theme requires some basic settings to work properly with no issues, and this is somehow different from many other minimal wordpress themes as it includes tons of features and options to make it easy for you to make your website as you dream with.
So below what is required for Our theme to work:
- PHP 7.4 or higher.
- MySQL 5.6 or higher.
- max_execution_time 180
- memory_limit 256M
- post_max_size 32M
- upload_max_filesize 32M
- cURL – Supported by the server.
- PHP Modules – PHP XML, MBString, SimpleXML, Fsockopen/cURL, SoapClient, DOMDocument, GZip, Zip Archive, Iconv, OpenSSL > 1.0.2
- WordPress Importer plugin is installed and activated.
- No security plugins are active untill the import process completed.
Elementor Requirements:
Elementor is one of our supported page builders, it’s mandatory to make sure your web host supports the minimum requirements of Elementor, in case you want to use Elementor. Otherwise, you may experience issues like “The Preview could not be loaded” or “can not find the_content” issues or blank screen of death while loading a page in your back-end. You can find the Elementor minimum requirements Here.Woocommerce Requirements:
Crust Already supports WooCommerce Plugin, so if you are going to set up a shop, please make sure your server also supports woocommerce plugin requirements Here.How to Install WordPress #back to top
Upload via WordPress Admin
WordPress is a free and open source blogging tool and a content management system (CMS) based on PHP and MySQL. It enables you to build Websites and powerful on-line applications and requires almost no technical skills or knowledge to manage. Many aspects, including its ease of use and extensibility, have made WordPress the most popular Web site software available.
What is a WordPress Theme ?
A WordPress Theme is a skin for a website built with the WordPress CMS platform. In other words, you can easily change your WordPress Web site appearance by installing a new Theme in a few easy steps. With all its simplicity, a WordPress Theme is provided with all the necessary source files and you are free to edit or extend it the way you need
More Links to make it easy with WordPress:
How to Install Crust #back to top
1) Download & Organize Files:
After downloading the ZIP file UNIZP that file, after unzipping you see various structure of theme.
- Theme/crust.zip (Root file to install wordpress theme)
- Licensing (File which include information about wordpress & theme under GPL liscense)
- Resources (Directory which includes the Crust Core and Slider Revolutions plugins.)
Upload via WordPress Admin
- Extract the downloaded file Package.zip to your computer.
- Login to your wordpress dashboard, go to WordPress Appearance -> Themes section.
- Click on Install Themes tab.
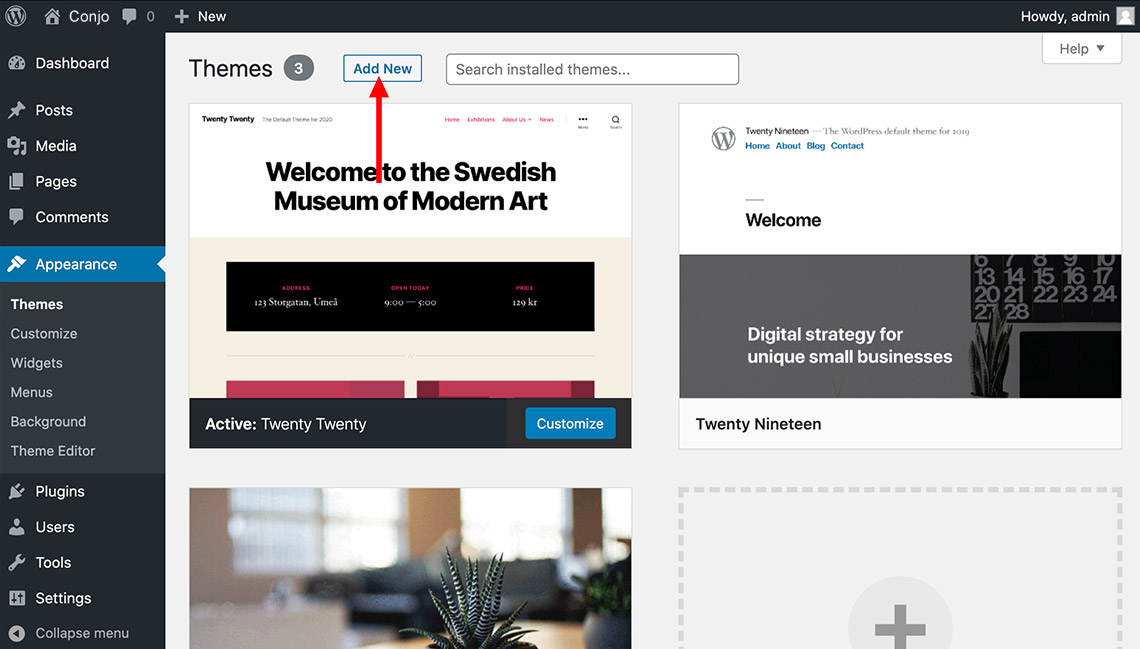
- Click on Choose File button, and select crust.zip theme file from downloaded Package and click Install Now button.
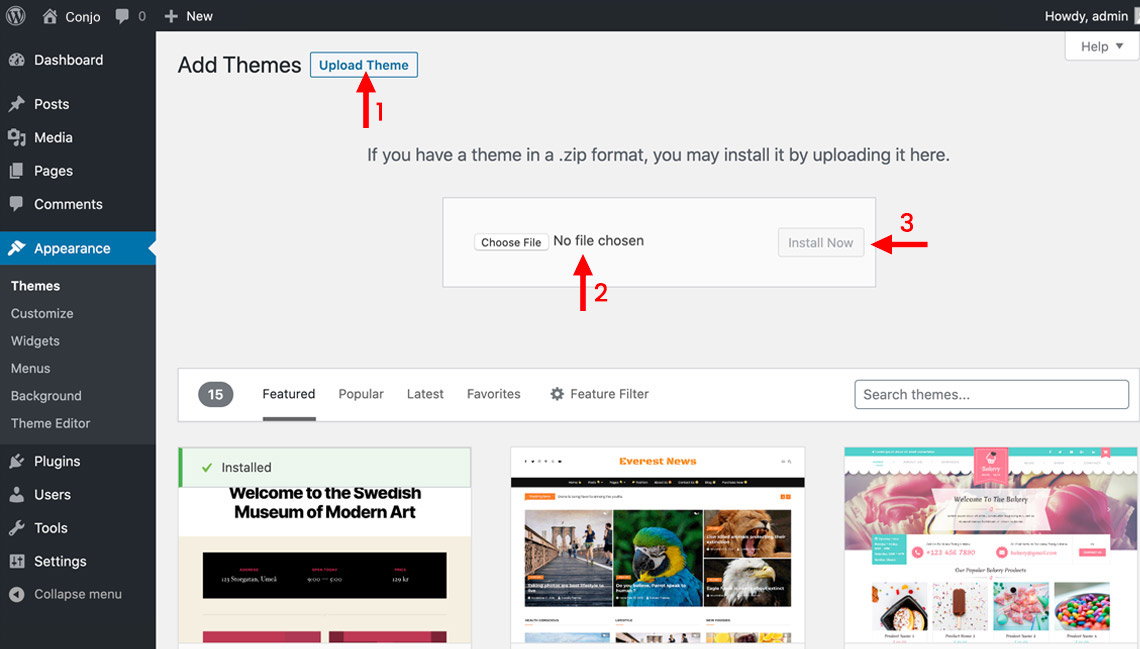
Note : This method will only work if your server allows space greater than 5 MB. Usually hosting providers provides only 2 MB, So it is recommended to increase the space.
Upload via FTP Server
- Go to the downloaded package then select
Theme/crust.zipand extract it. - Copy extracted files in Crust folder to /wp-content/themes/Crust via FTP Clients
- For example theme should be in wp-content/themes/crust
- Follow the instruction below for activating the theme.
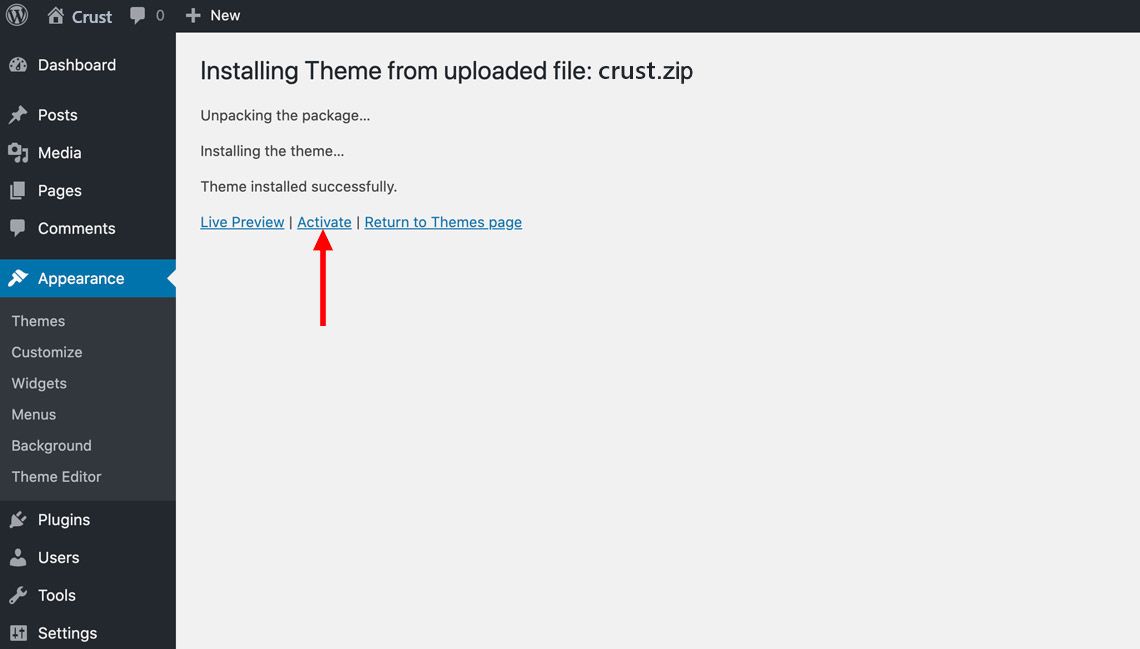
Activating Crust
- Log in to the WordPress Administration Panels.
- Select the Appearance panel, then Themes.
- From the Available Themes section, click on the Crust title (or Crust screenshot) to activate.
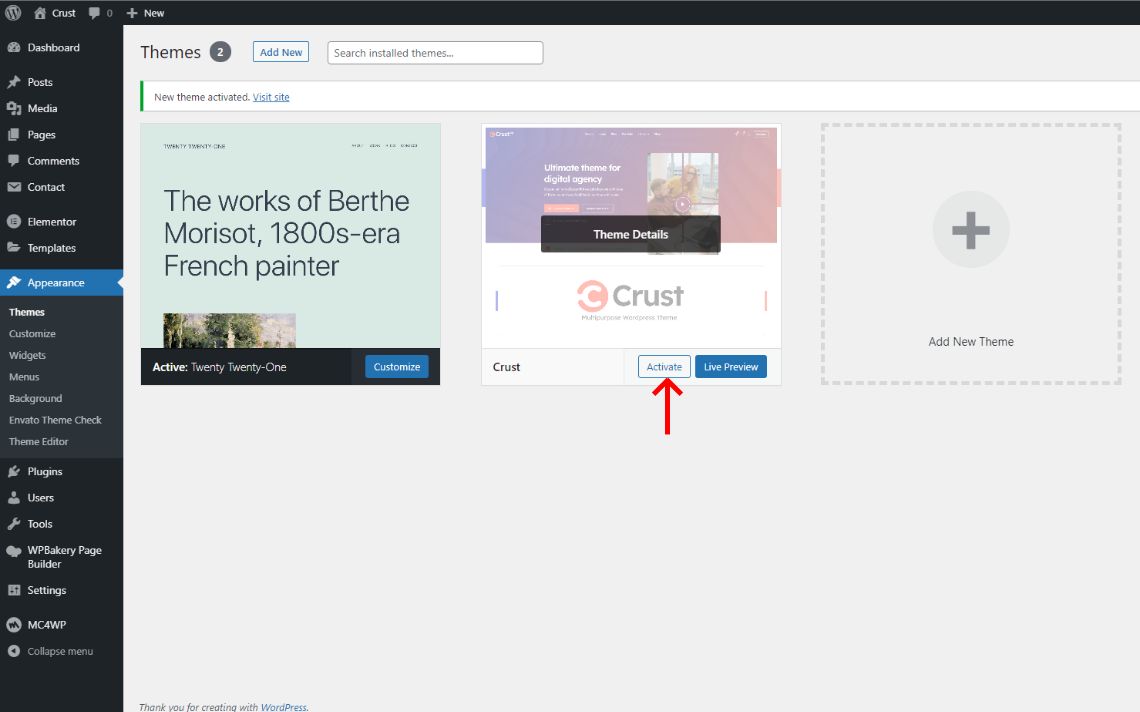
- A preview of the Theme will be shown.
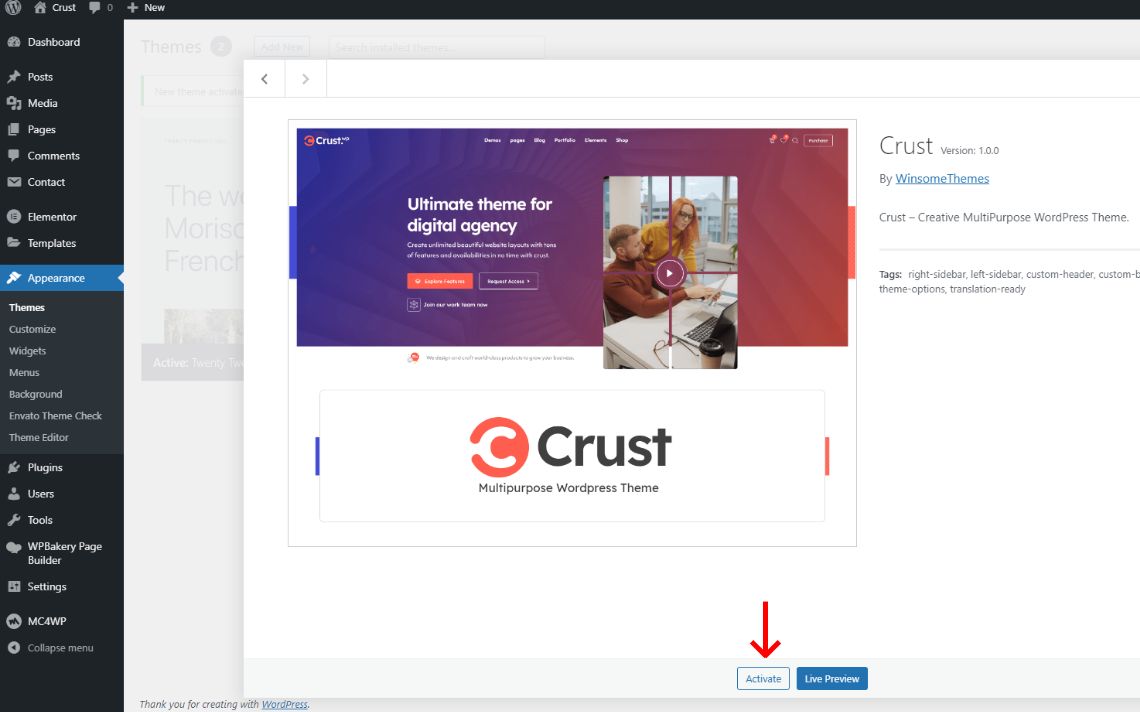
- To activate the Theme click the Activate Crust link in the top right.
Updating Crust
Via Envato Market WordPress Plugin
- Download it here: https://www.envato.com/lp/market-plugin/
- Log in to the WordPress Administration Panel.
- Select Plugins > Add New.
- Upload the Envato Market plugin.
- Follow it's instructions and you are now done.
Via Easy Theme and Plugin Upgrades Plugin
- Download it here: https://wordpress.org/plugins/easy-theme-and-plugin-upgrades/
- Log in to the WordPress Administration Panel.
- Select Plugins > Add New.
- Search For : Easy Theme and Plugin Upgrades.
- Install and Follow it's instructions and you are now done.
Via FTP Server
- First Take a backup from the old (crust) theme folder located in wp-content/themes
- Go to the latest version downloaded package then select
Theme/crust.zipand extract it. - Copy extracted folder ( crust ) to /wp-content/themes.
- For example theme should be in wp-content/themes/crust.
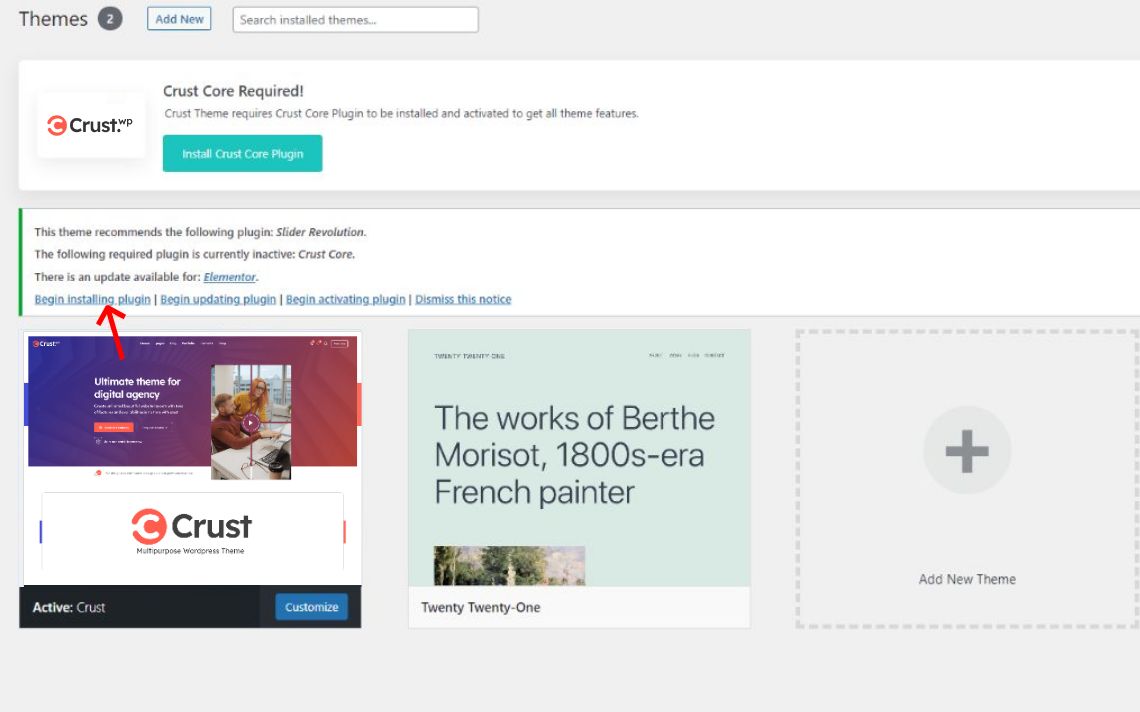
Required Plugins #back to top
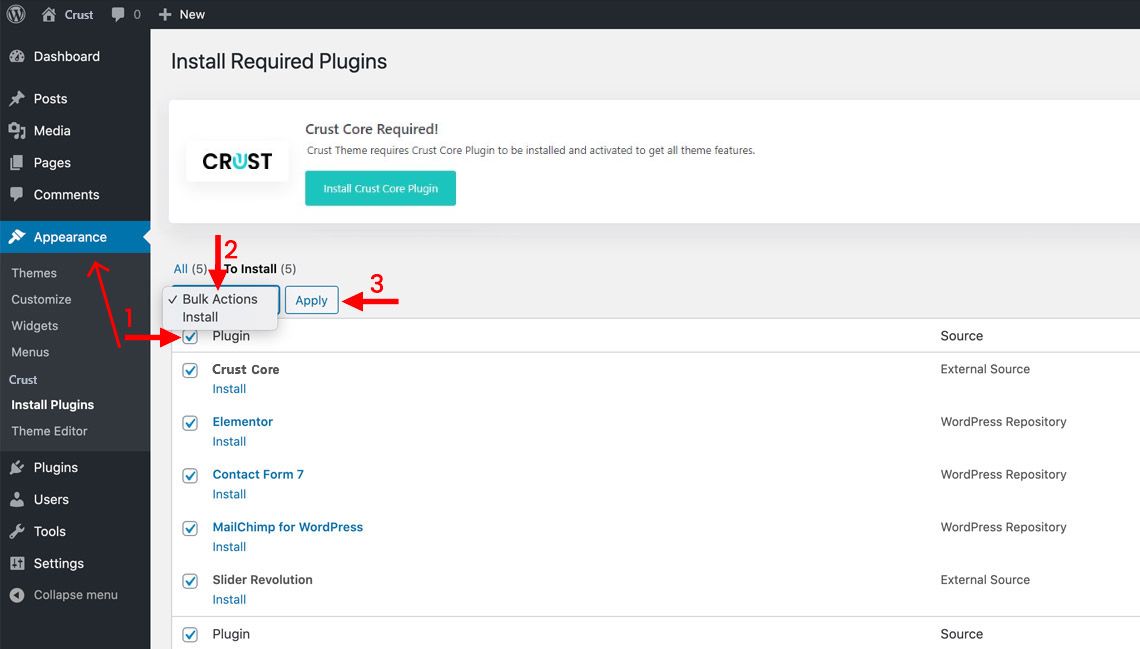
In order for the theme to work properly we require some extra plugins to be installed and activated via the top info message in the image below:
Then You will be redirected to the page that displays the list of required plugins to be iinstalled, just Select All then Choose to install and click the button.
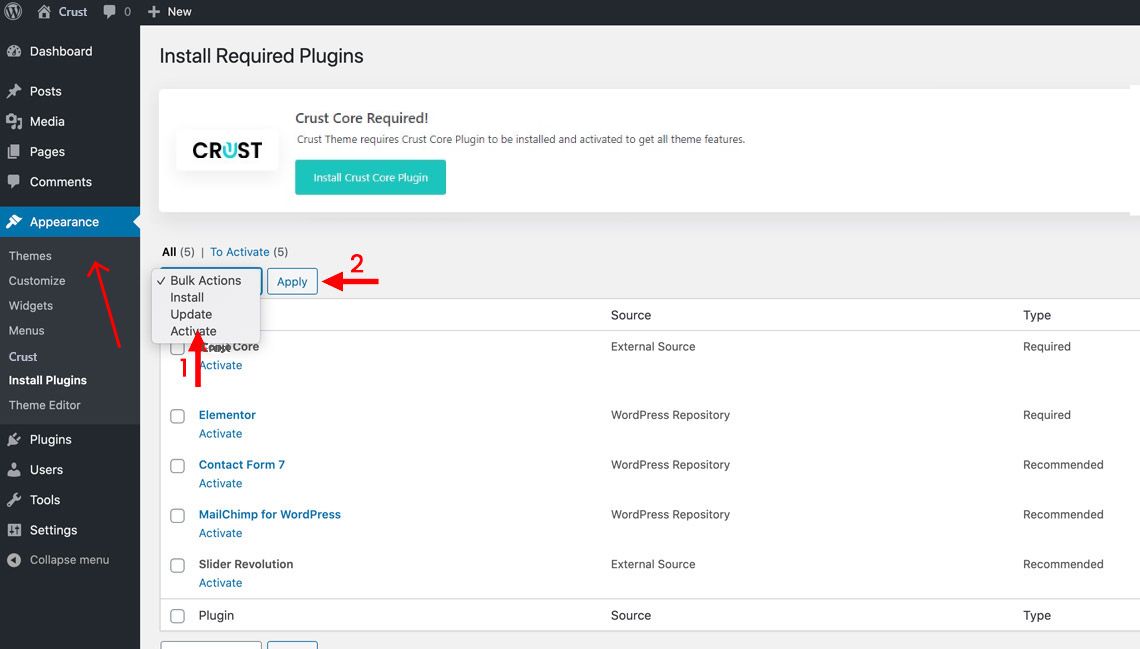
After that you will need to Activate the installed plugins, so after the installation finish a bottom link "Return to Required Plugins Installer" will appear, click and you will be redirected to the same page but with an activate button like the below image.
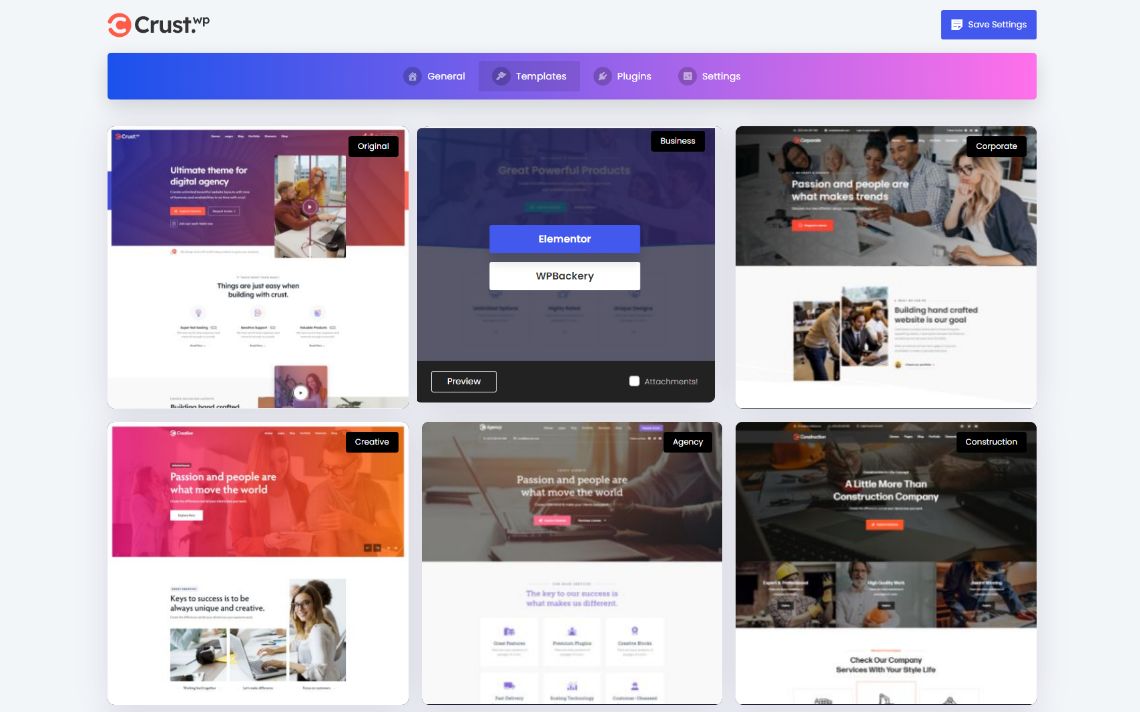
Import Demo Templates #back to top
This will import EVERYTHING like our main demo content (Sliders, Portfolio Grids) Automatically, So Crust CORE Plugin must be installed and activated.
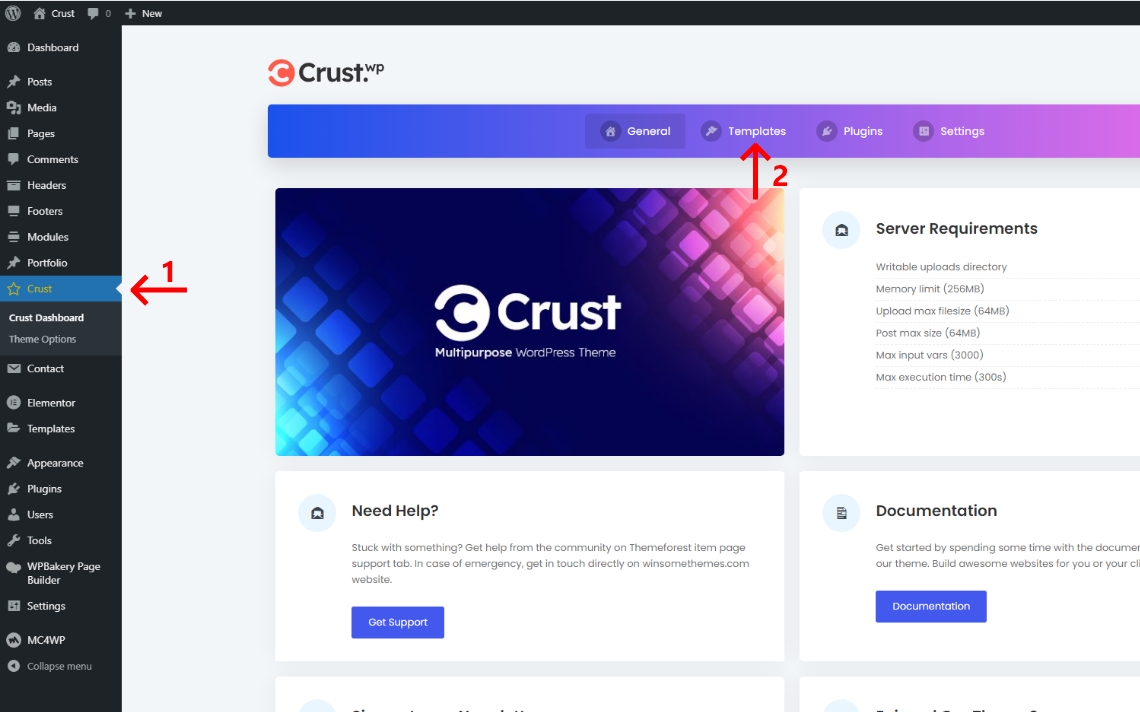
- Go to your wodpress admin panel
- Go to Crust Control Panel as shown in the following image:
- Click the Templates tab and choose a template from the available templates.
- tab and choose a template from the available templates.
This video explains how to import Demo Templates easily.
Import Internal Pages #back to top
This video explains how to import internal pages via elementor page builder.
This video explains how to import internal pages via WPBakery page builder.
How to Use Option Panel #back to top
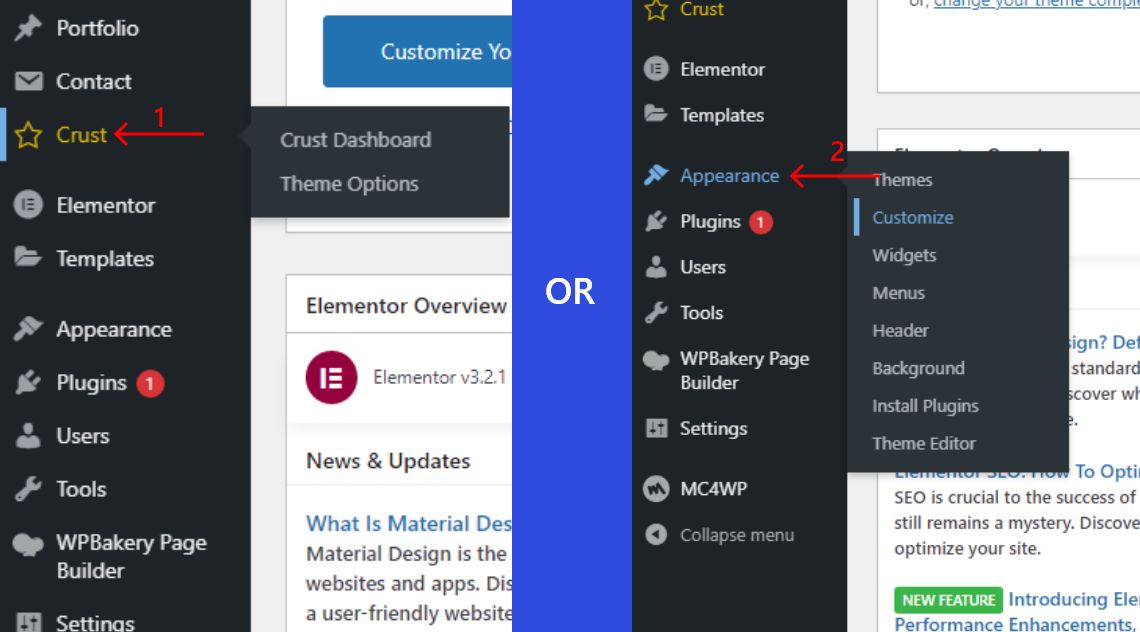
You can access the theme options panel from two links in your WP Dashboard:
- Appearance > Customize.
- Crust > Customize.
Site Identity - #back to top
Choose the logo, Retina logo, Sticky & Retina Sticky logo and Mobile & retina mobile logo, and also choose to show / hide the site Tagline.
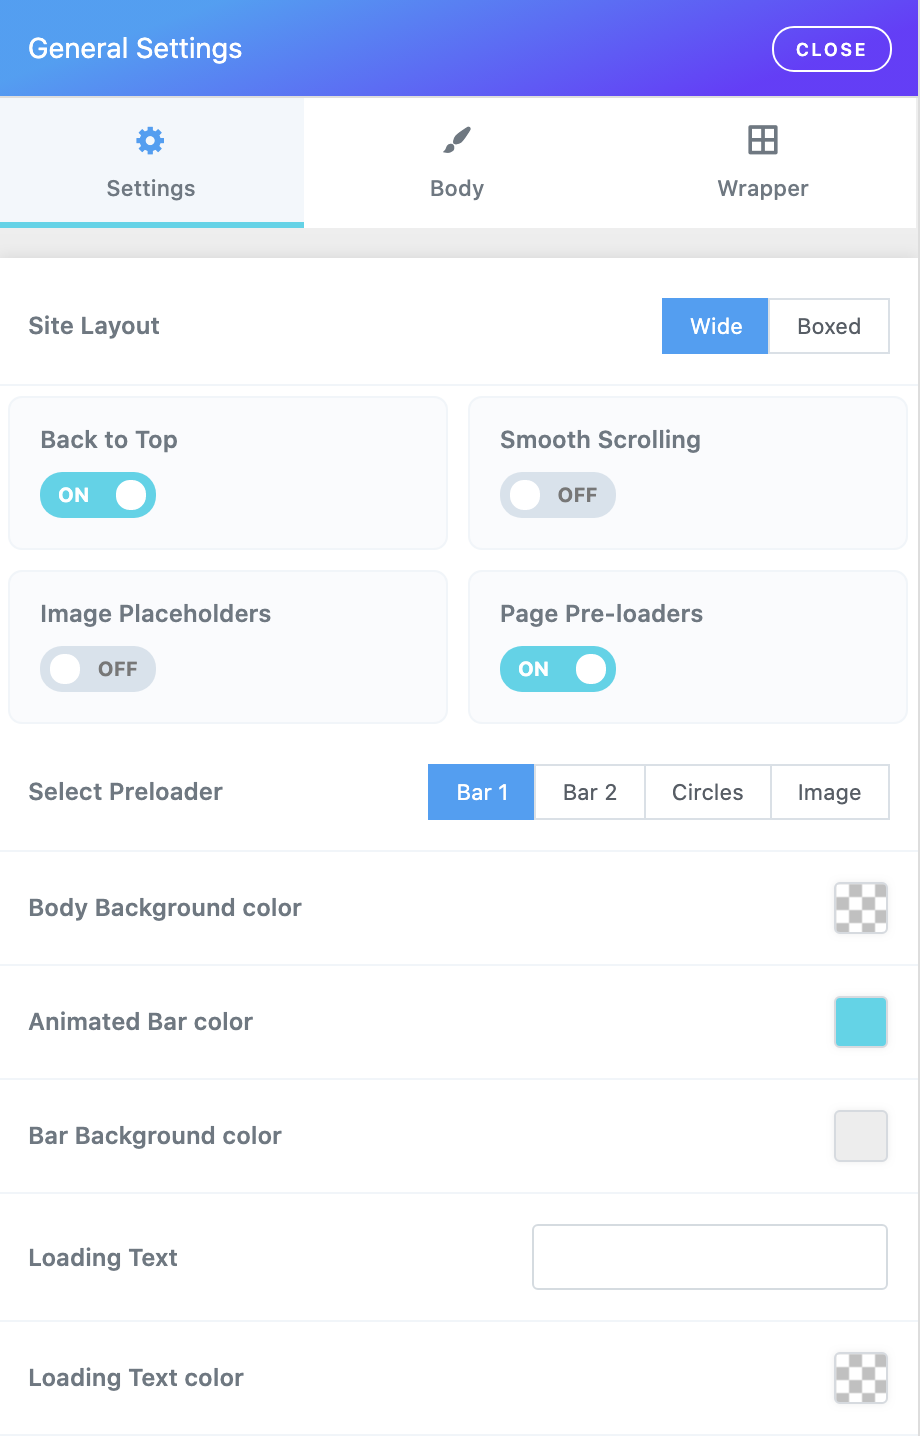
General Settings / Settings - #back to top
- Choose layout: Choose the Wide or Boxed Layout of your site.
- Back To Top Button: Show the back to top button at the bottom of the page when scrolling down.
- Smooth Scrolling: Enable / Disable the mouse wheel smooth scrolling while navigating the site.
- Image Placeholders: Show default image for posts that not having featured image.
- Page Pre-loaders Enable / disable Page loader.
- Body Background color: Body background color for page loader only.
- Select Pre-loader: Select a preloading style from 3 available ones ( Or Upload a custom loading image ) that appears before page completely loaded.
- Animated Bar color: Animated bar forecolor.
- Bar Background color: Animated bar background color.
- Loading Text: Enter text that shows below the loading bar.
- Loading Text Color: color for the loading text below the loading bar.

General Settings / Body - #back to top
- Primary color: Select the main theme color that will be applied on all elements of your site.
- Secondary color: Select the alternative secondary theme color.
- Links color: Choose new custom color for all site links from the color picker.
- Background color: Choose your new body custom background color from the color picker.
- Background Image: Select an image to use for the body background image.
- Margin: Set site outer spacings (margin).
- Padding: Set site inner spacings (padding).
- Border width: Set a border around the body.
- Border color: Set a border color from the color picker.
- Border style: Set a border style.
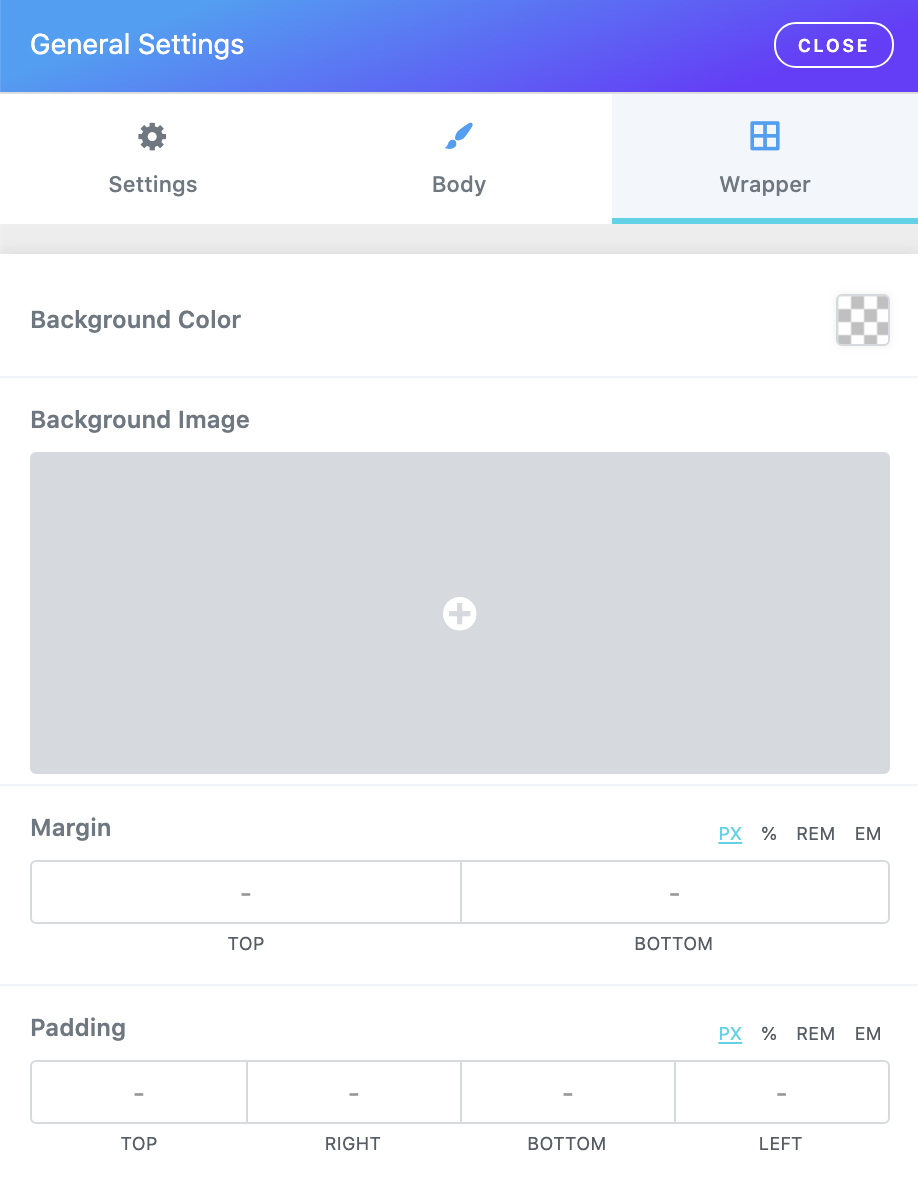
General Settings / Wrapper - #back to top
- Background color: Choose your new wrapper custom background color from the color picker.
- Background Image: Select an image to use for the wrapper background image.
- Margin: Set the wrapper top and bottom spacings (margin).
- Padding: Set the wrapper inner spacings (padding).
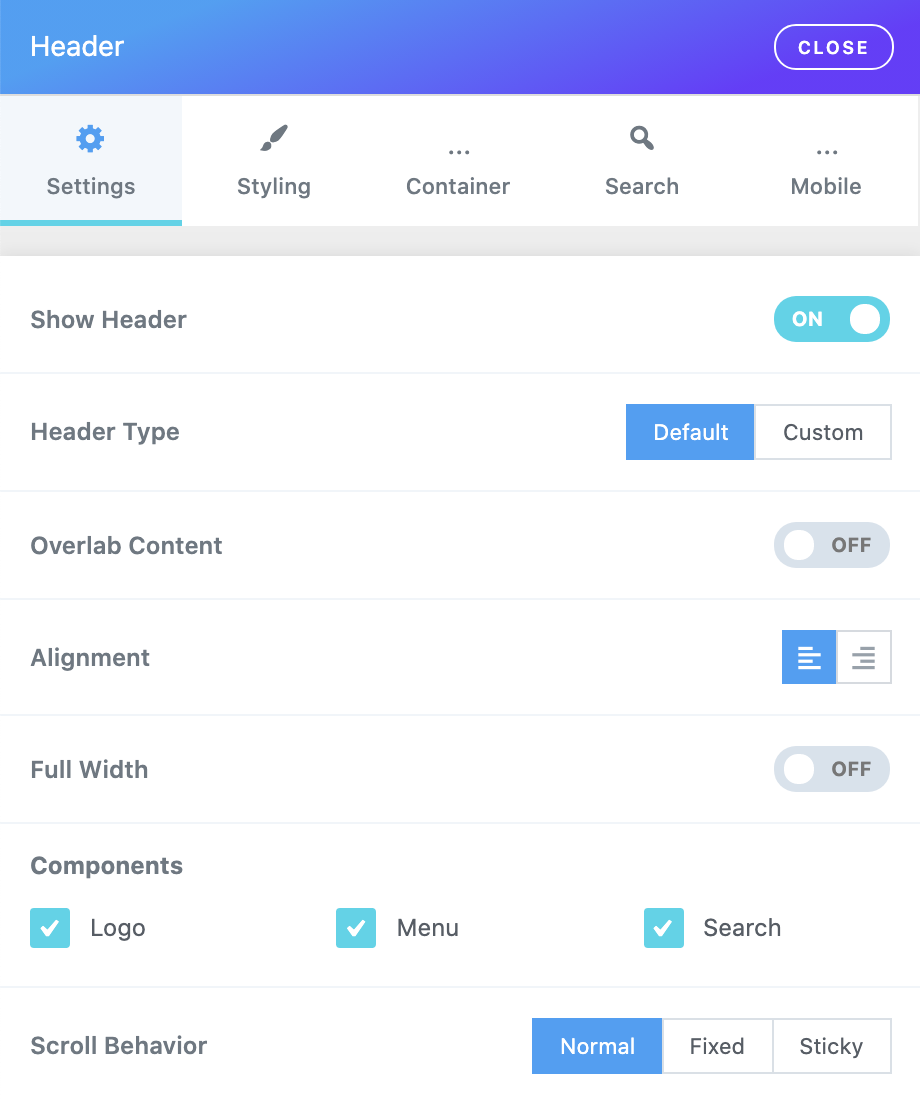
Header / Settings - #back to top
- Show Header: Show / Hide site header.
- Header Type: Select the header type Normal or from an Elementor template.
- Overlab Content: Set the header position to be normal or fixed over the site content.
- Alignment: Left or right aligned header.
- Full Width: Boxed or full width header.
- Components: Choose what you want to display in the header.
- Scroll Behavior: Normal header or fixed or sticky header on mouse scroll.
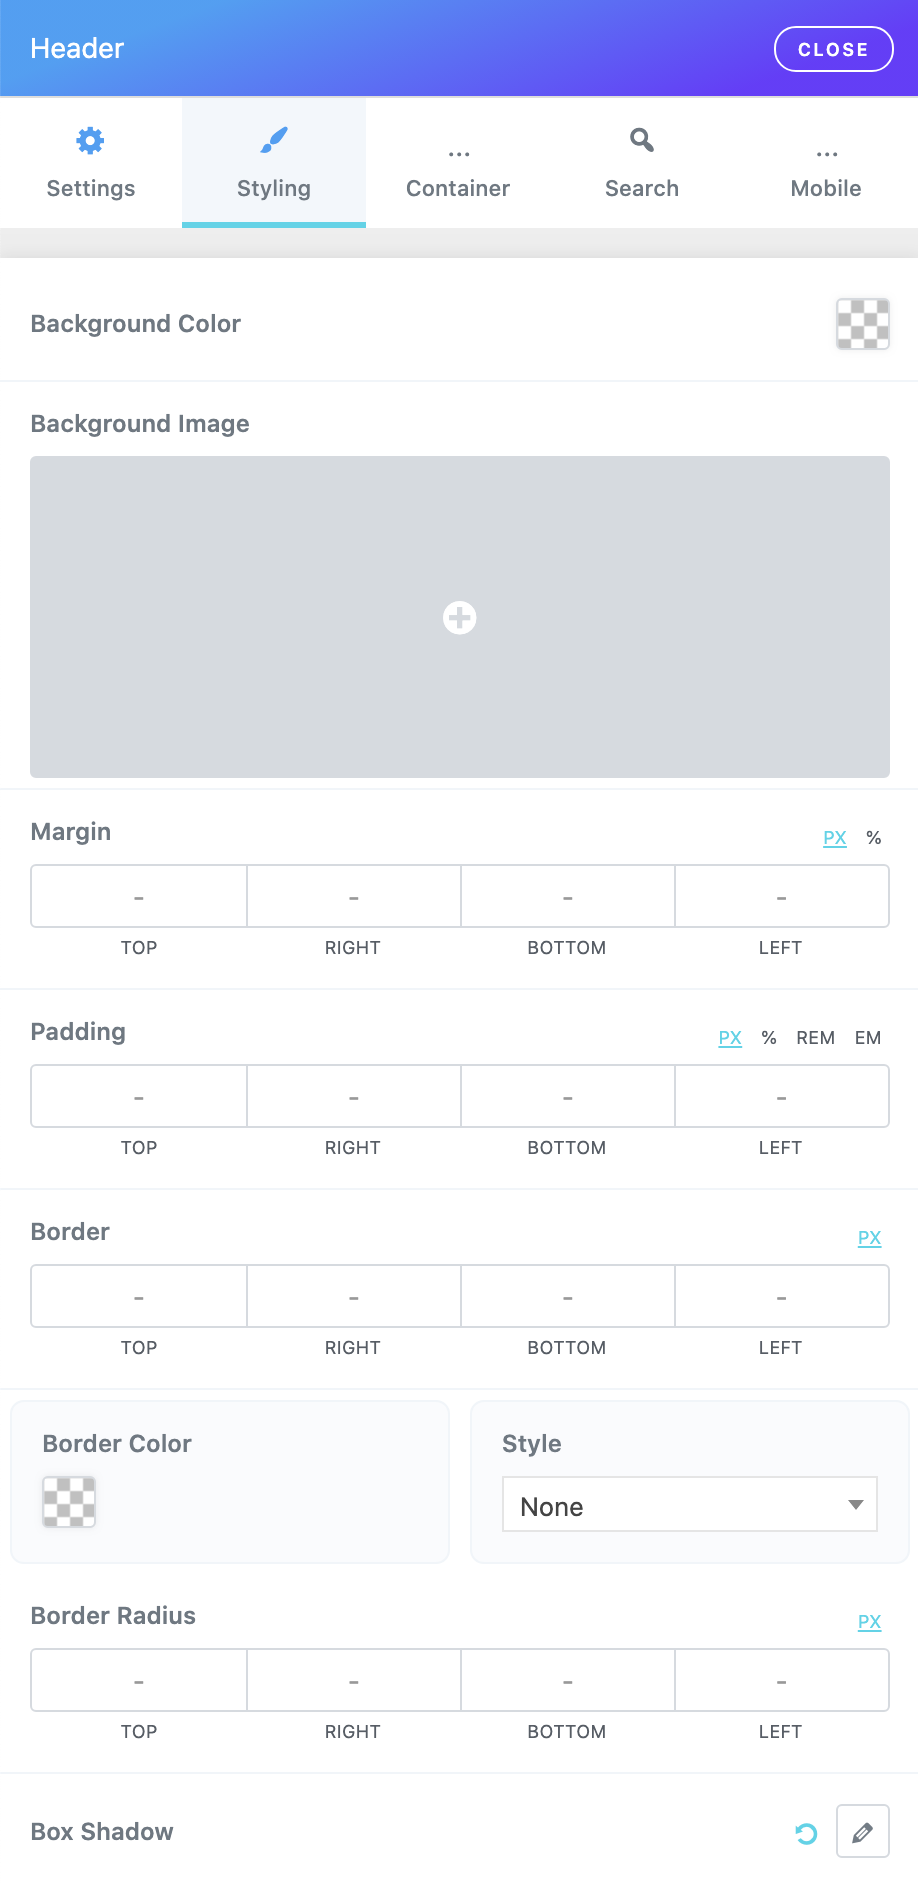
Header / Styling - #back to top
- Background color: Choose your new header custom background color from the color picker.
- Background Image: Select an image to use for the header background image.
- Margin: Set the header outer spacings (margin).
- Padding: Set the header inner spacings (padding).
- Border width: Set a border around the header.
- Border color: Set a border color from the color picker.
- Border style: Set a border style.
- Border Radius: Set a border radius for the header.
- Box Shadow: Set a box shadow for the header.

Header / Container - #back to top
- Background color: Choose your new header container custom background color from the color picker.
- Background Image: Select an image to use for the header container background image.
- Padding: Set the header container inner spacings (padding).
- Border width: Set a border around the header container.
- Border color: Set a border color from the color picker.
- Border style: Set a border style.
- Border Radius: Set a border radius for the header container.
- Box Shadow: Set a box shadow for the header container.
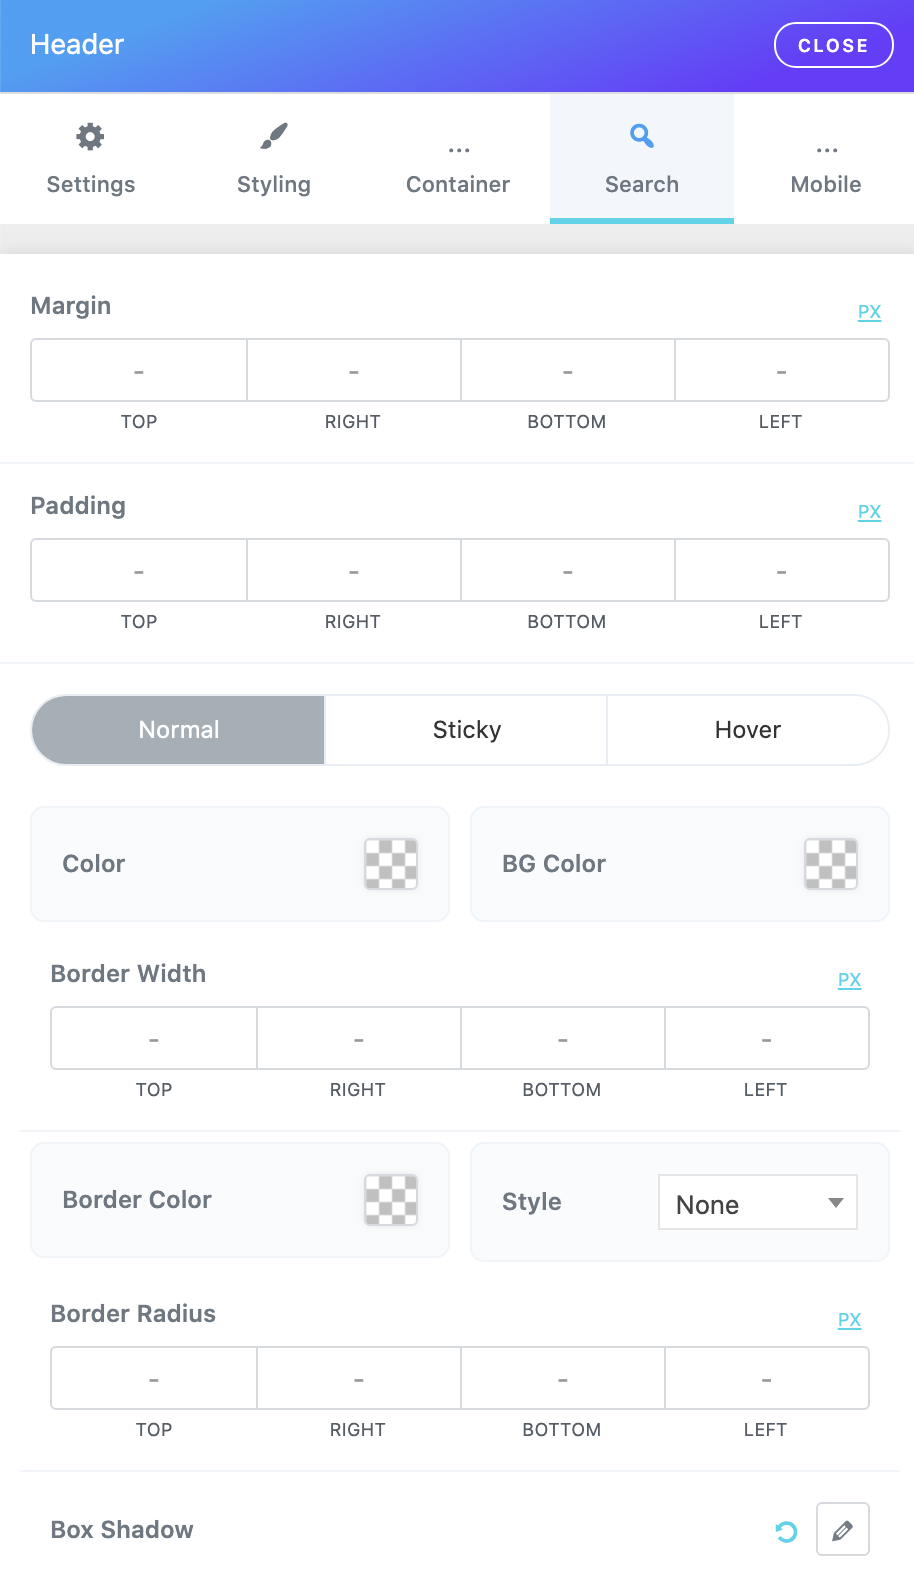
Header / Search - #back to top
- Margin: Set the search icon outer spacings (margin).
- Padding: Set the search icon inner spacings (padding).
- Color: Choose search icon custom color from the color picker.
- Background color: Choose search icon custom background color from the color picker.
- Border width: Set a border around the search icon.
- Border color: Set a border color from the color picker.
- Border style: Set a border style.
- Border Radius: Set a border radius for the search icon.
- Box Shadow: Set a box shadow for the search icon.
Do the previous settings for the hover and sticky options.
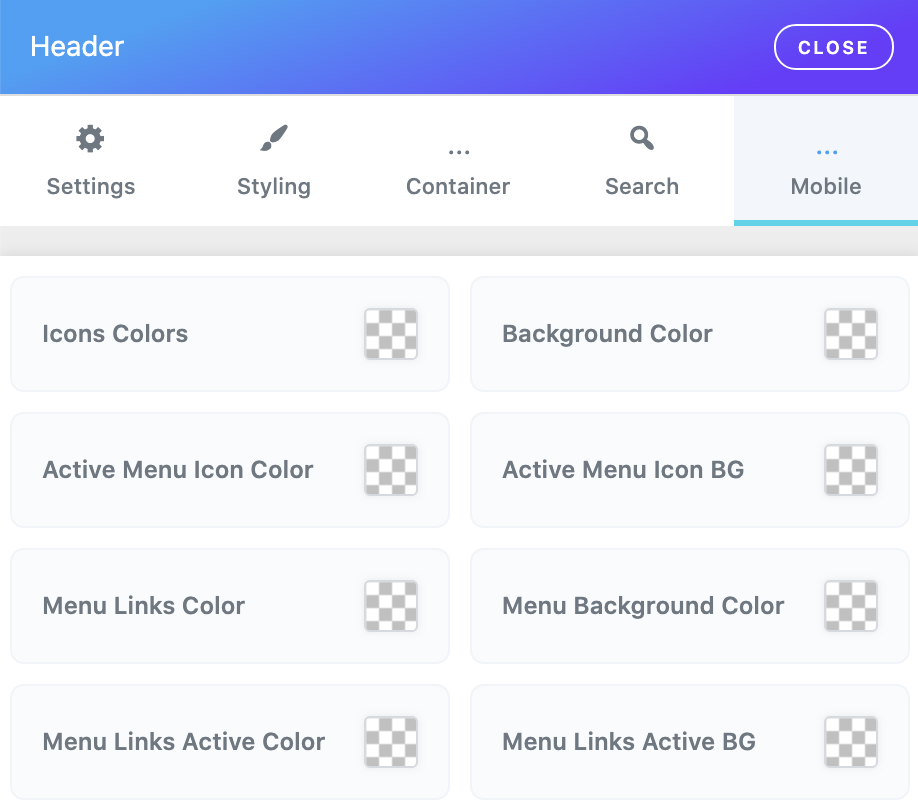
Header / Mobile - #back to top
- Icons Colors: Choose mobile icons custom color.
- Background Color: Choose mobile header background color.
- Active Menu Icon Color: Choose mobile active menu icon color.
- Active Menu Icon BG: Choose mobile active menu icon BG color.
- Menu Links Color: Choose mobile menu links custom color.
- Menu Background Color: Choose mobile dropdown menu BG color.
- Menu Links Active Color: Choose mobile current menu links color.
- Menu Links Active BG: Choose mobile current menu links BG color.
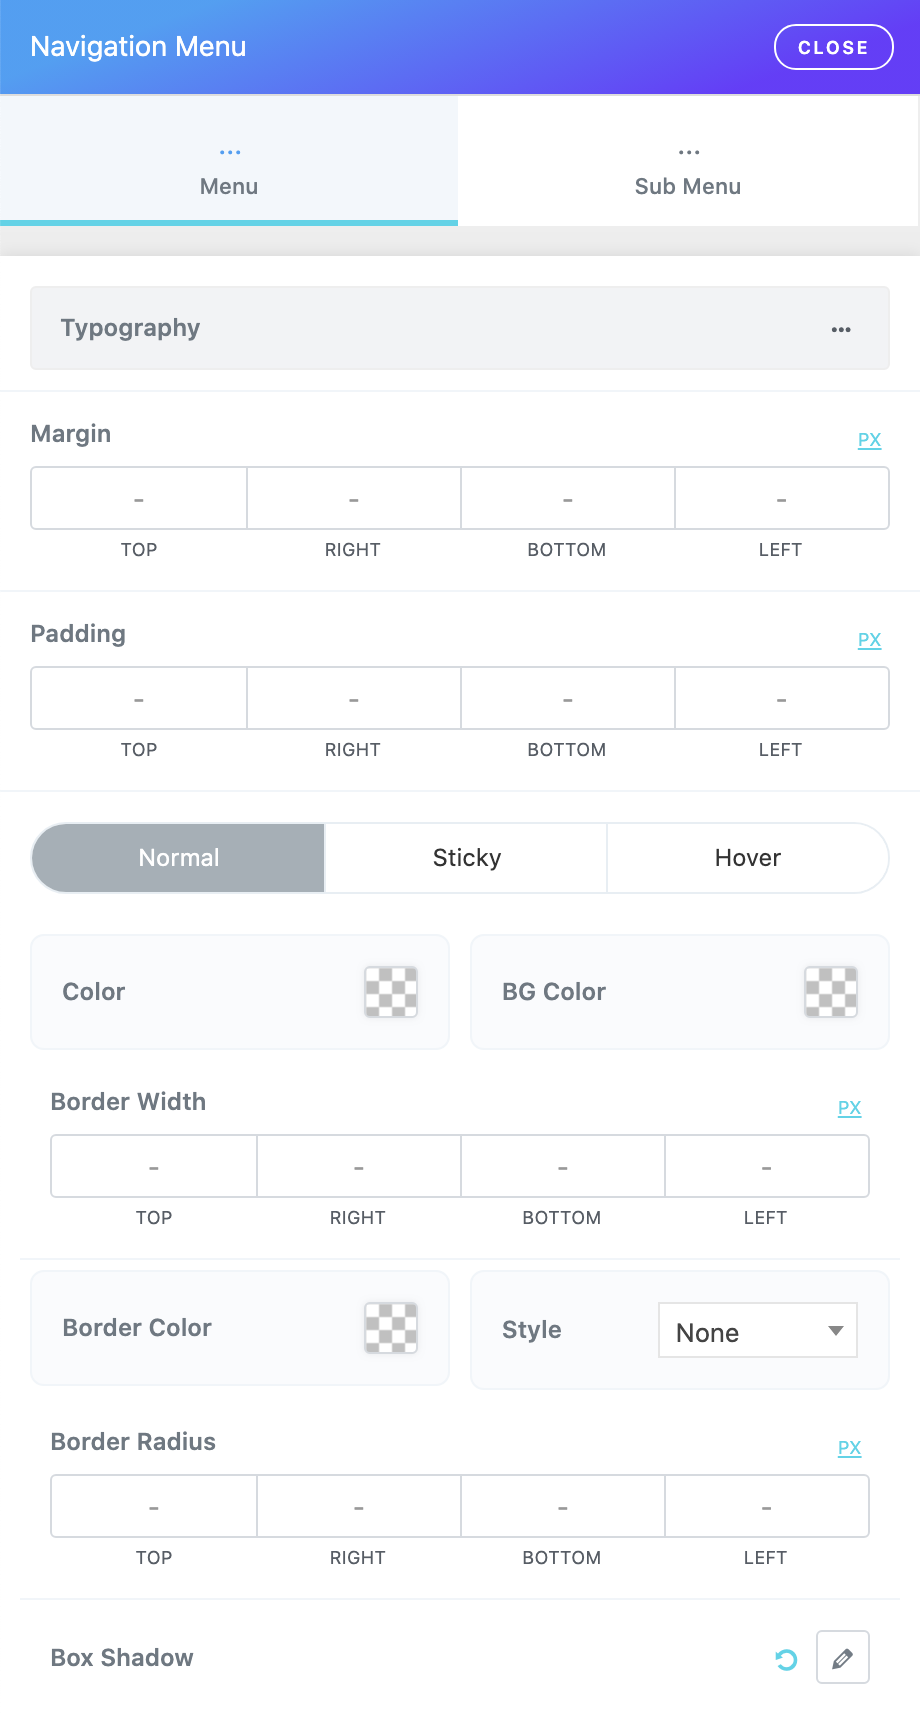
Navigation Menu / Main Menu - #back to top
- Typography: Set the top level menu items font size, weight, letter spacing, etc...
- Margin: Set the menu item outer spacings (margin).
- Padding: Set the menu item inner spacings (padding).
- Color: Choose menu item custom color from the color picker.
- Background color: Choose menu item custom background color from the color picker.
- Border width: Set a border around the menu item.
- Border color: Set a border color from the color picker.
- Border style: Set a border style.
- Border Radius: Set a border radius for the menu item.
- Box Shadow: Set a box shadow for the menu item.
Do the previous settings for the hover and sticky options.
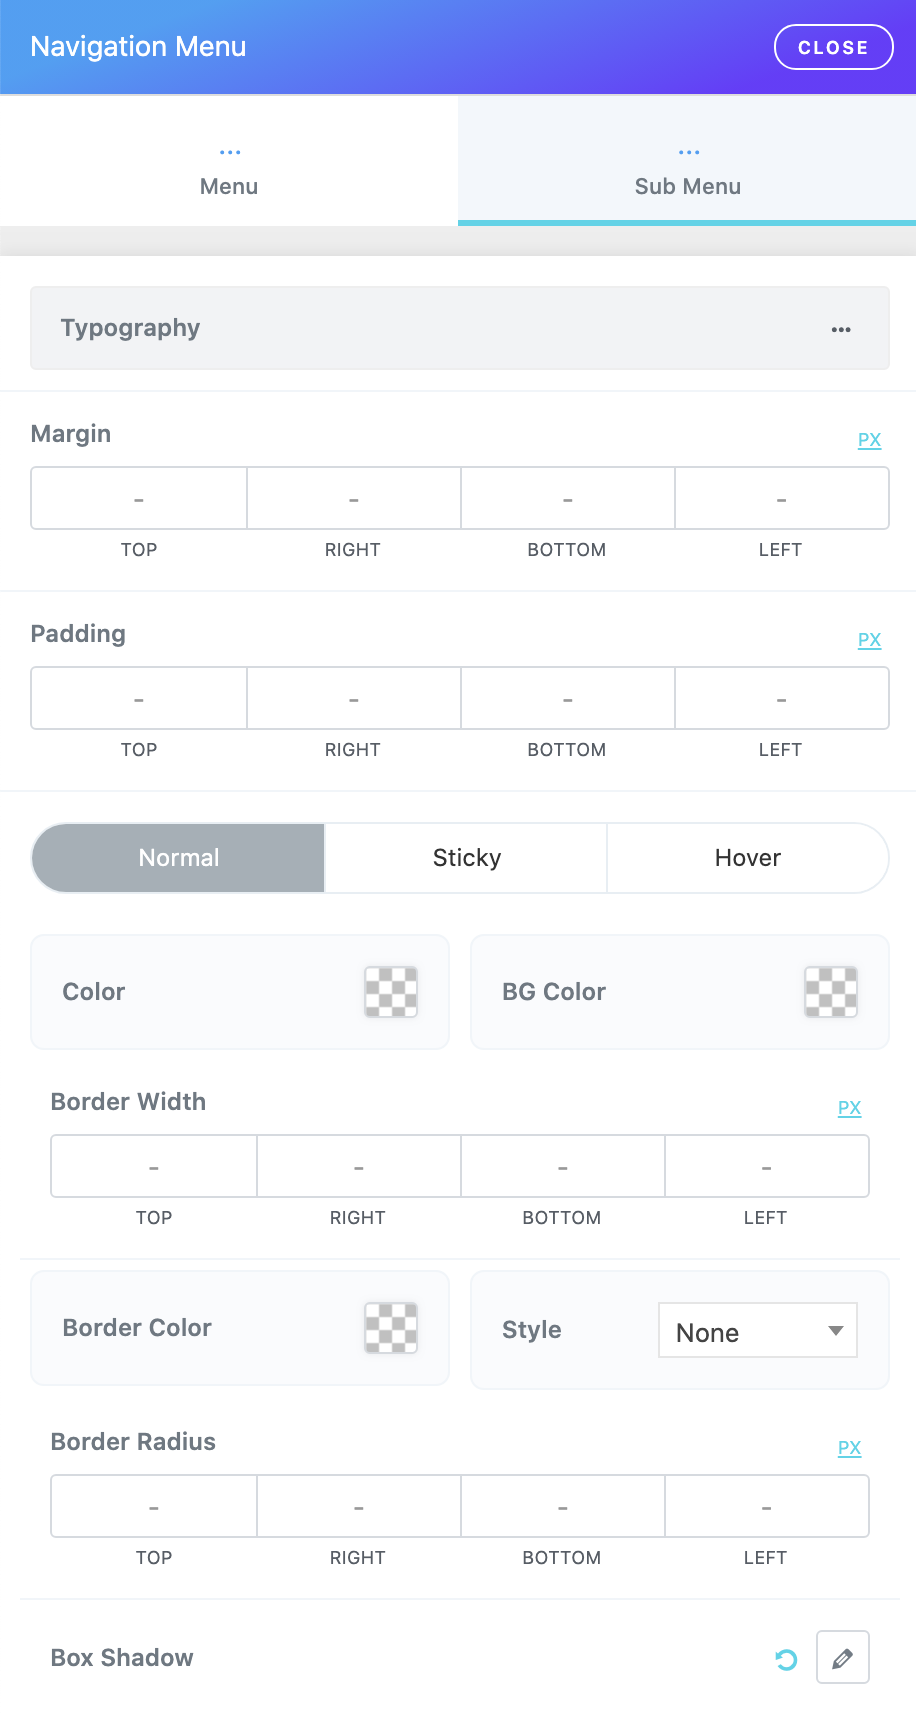
Navigation Menu / Sub Menu - #back to top
- Typography: Set the children menu items font size, weight, letter spacing, etc...
- Margin: Set the menu item outer spacings (margin).
- Padding: Set the menu item inner spacings (padding).
- Color: Choose menu item custom color from the color picker.
- Background color: Choose menu item custom background color from the color picker.
- Border width: Set a border around the menu item.
- Border color: Set a border color from the color picker.
- Border style: Set a border style.
- Border Radius: Set a border radius for the menu item.
- Box Shadow: Set a box shadow for the menu item.
Do the previous settings for the hover and sticky options.
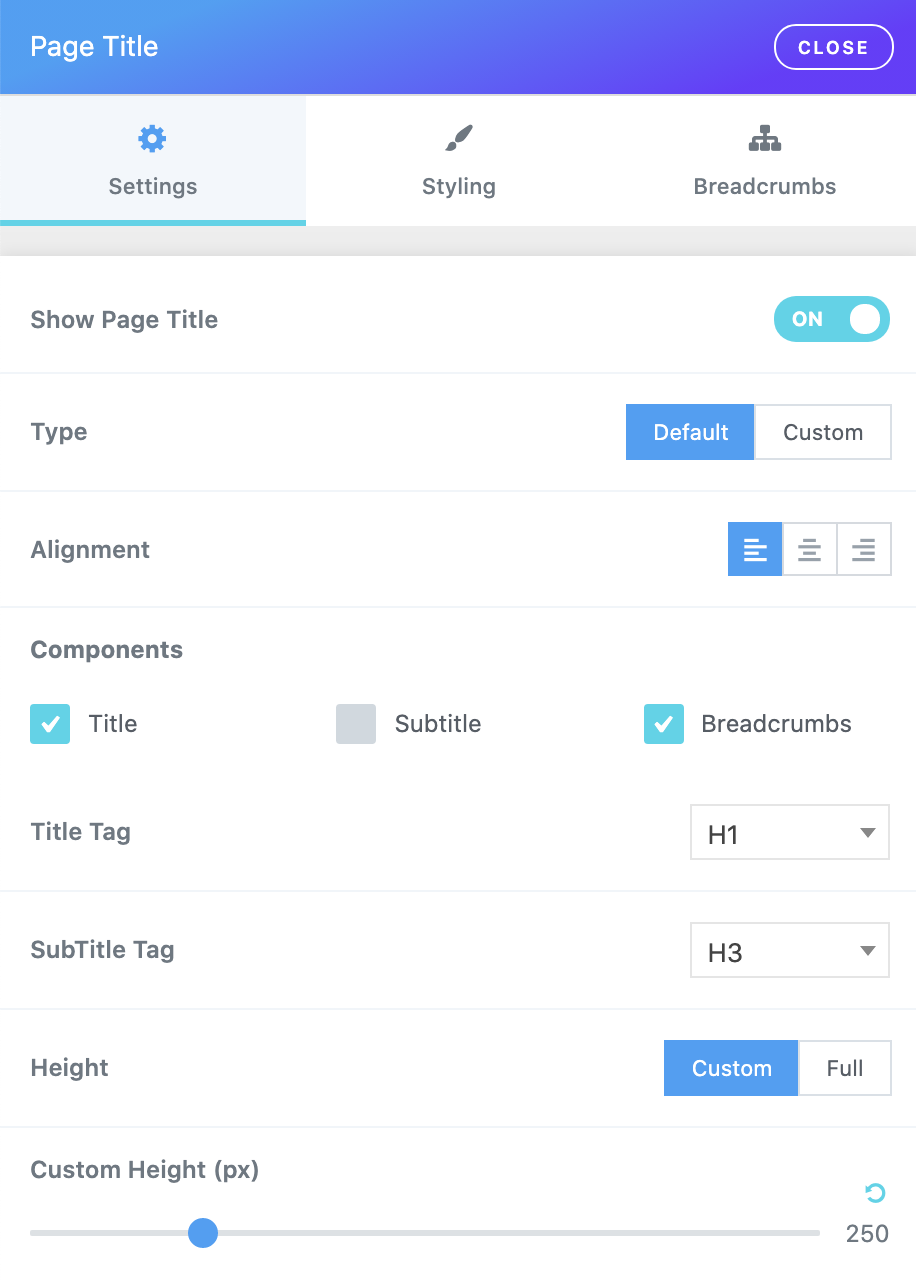
Page Title / Settings - #back to top
- Show Page Title: Show / Hide site page title.
- Type: Select the page title type Normal or from an Elementor template.
- Alignment: Left, center or right aligned page title.
- Components: Choose what you want to display in the page title.
- Title Tag: Set the main Page title Heading tag.
- SubTitle Tag: Set the sub Page title Heading tag.
- Height: Set a normal or custom height for the page title.
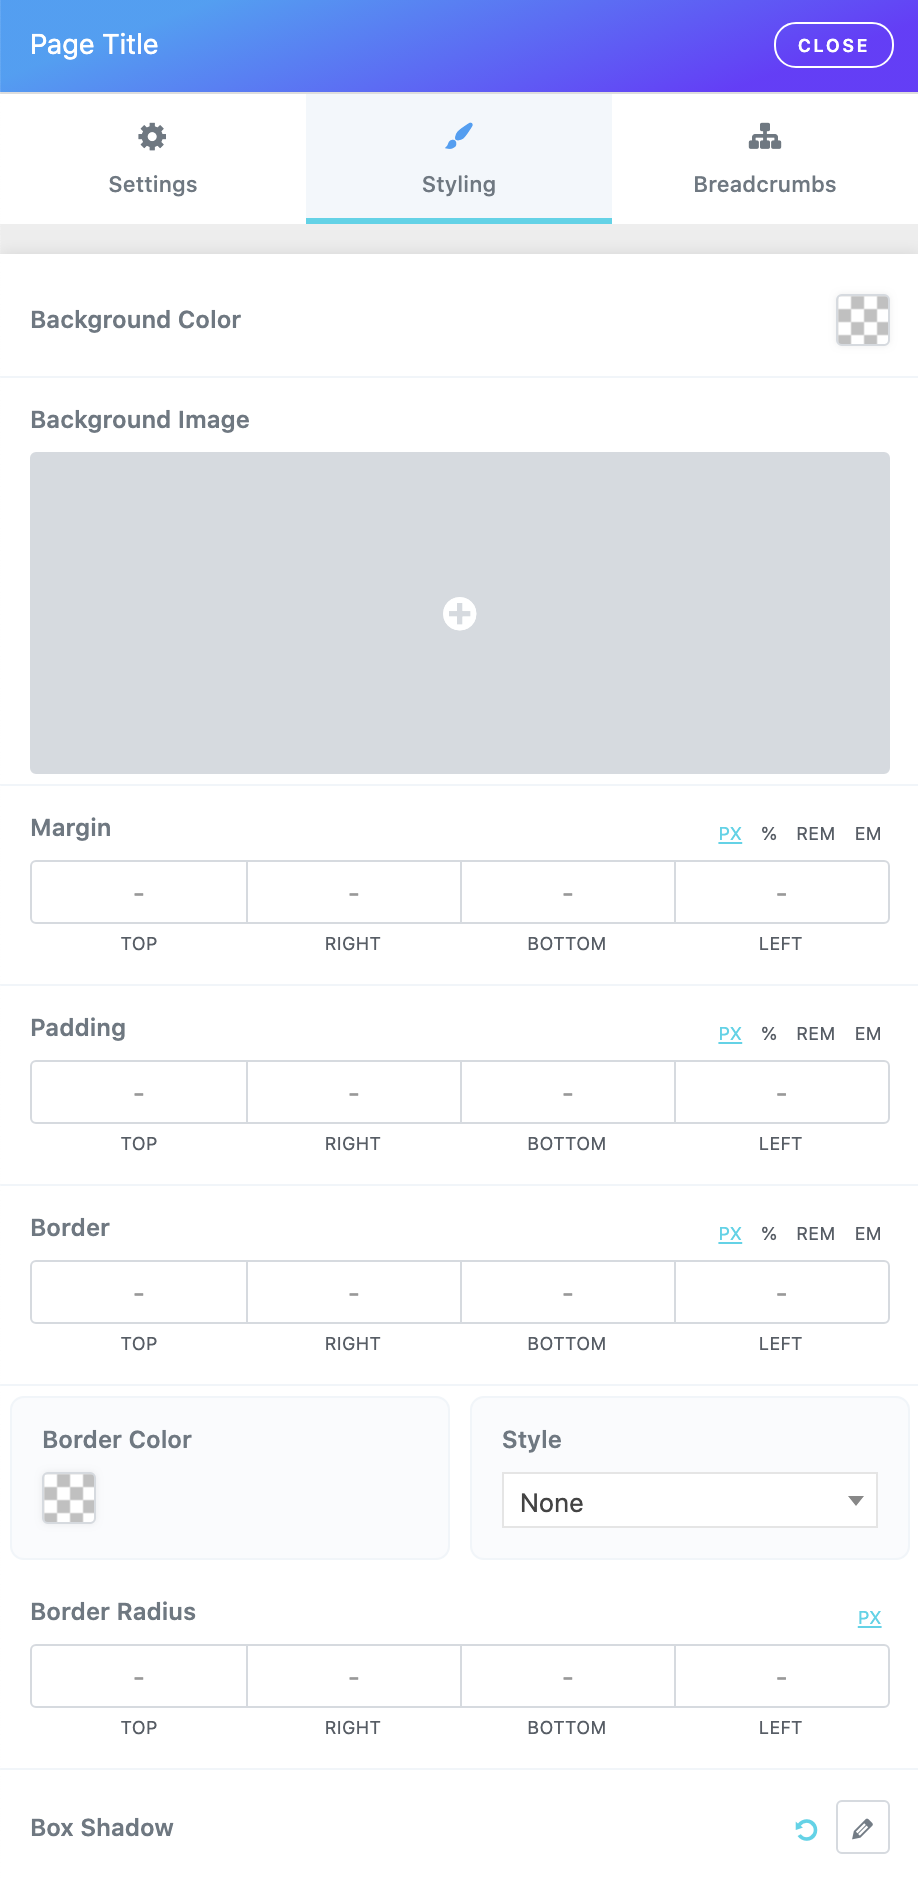
Page Title / Styling - #back to top
- Background color: Choose Page title custom background color.
- Background Image: Select an image to use for the Page title background image.
- Margin: Set the Page title outer spacings (margin).
- Padding: Set the Page title inner spacings (padding).
- Border width: Set a border around the Page title.
- Border color: Set a border color from the color picker.
- Border style: Set a border style.
- Border Radius: Set a border radius for the Page title.
- Box Shadow: Set a box shadow for the Page title.
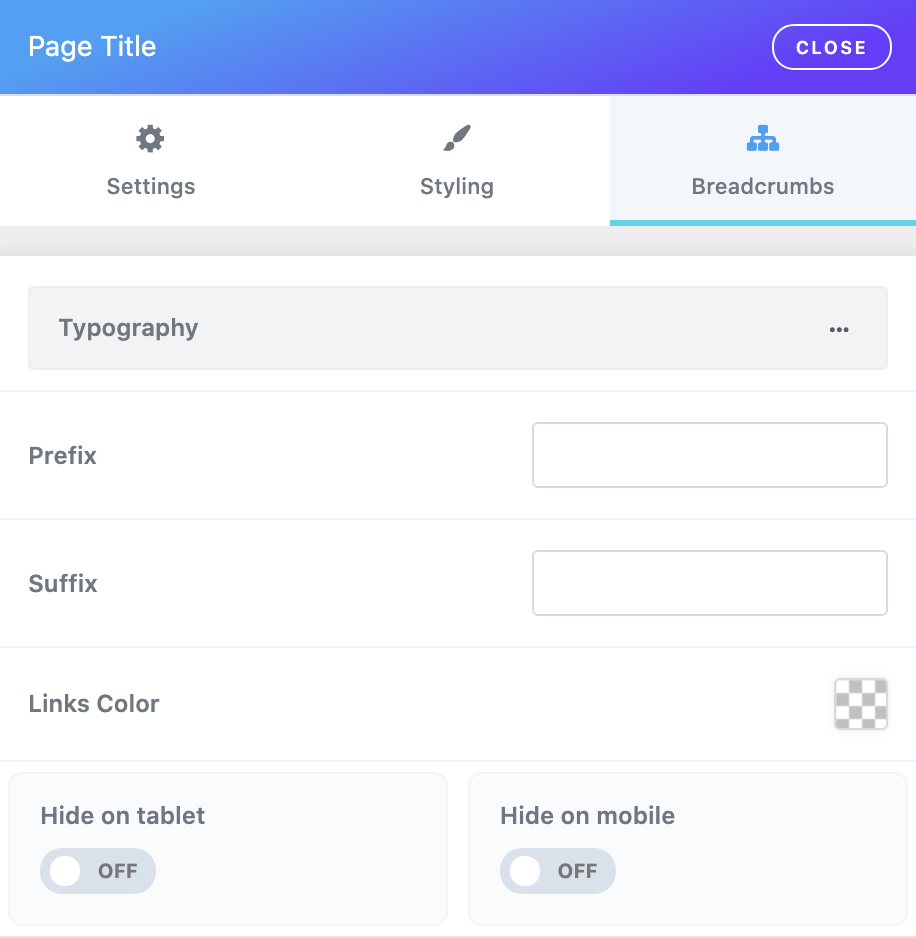
Page Title / Breadcrumbs - #back to top
- Typography: Set the breadcrumbs font size, weight, letter spacing, etc...
- Prefix: Set the text before the breadcrumbs.
- Suffix: Set the text after the breadcrumbs.
- Links Color: Choose breadcrumbs links color.
- Hide on tablet: Hide the breadcrumbs on tablet device.
- Hide on mobile: Hide the breadcrumbs on mobile device.
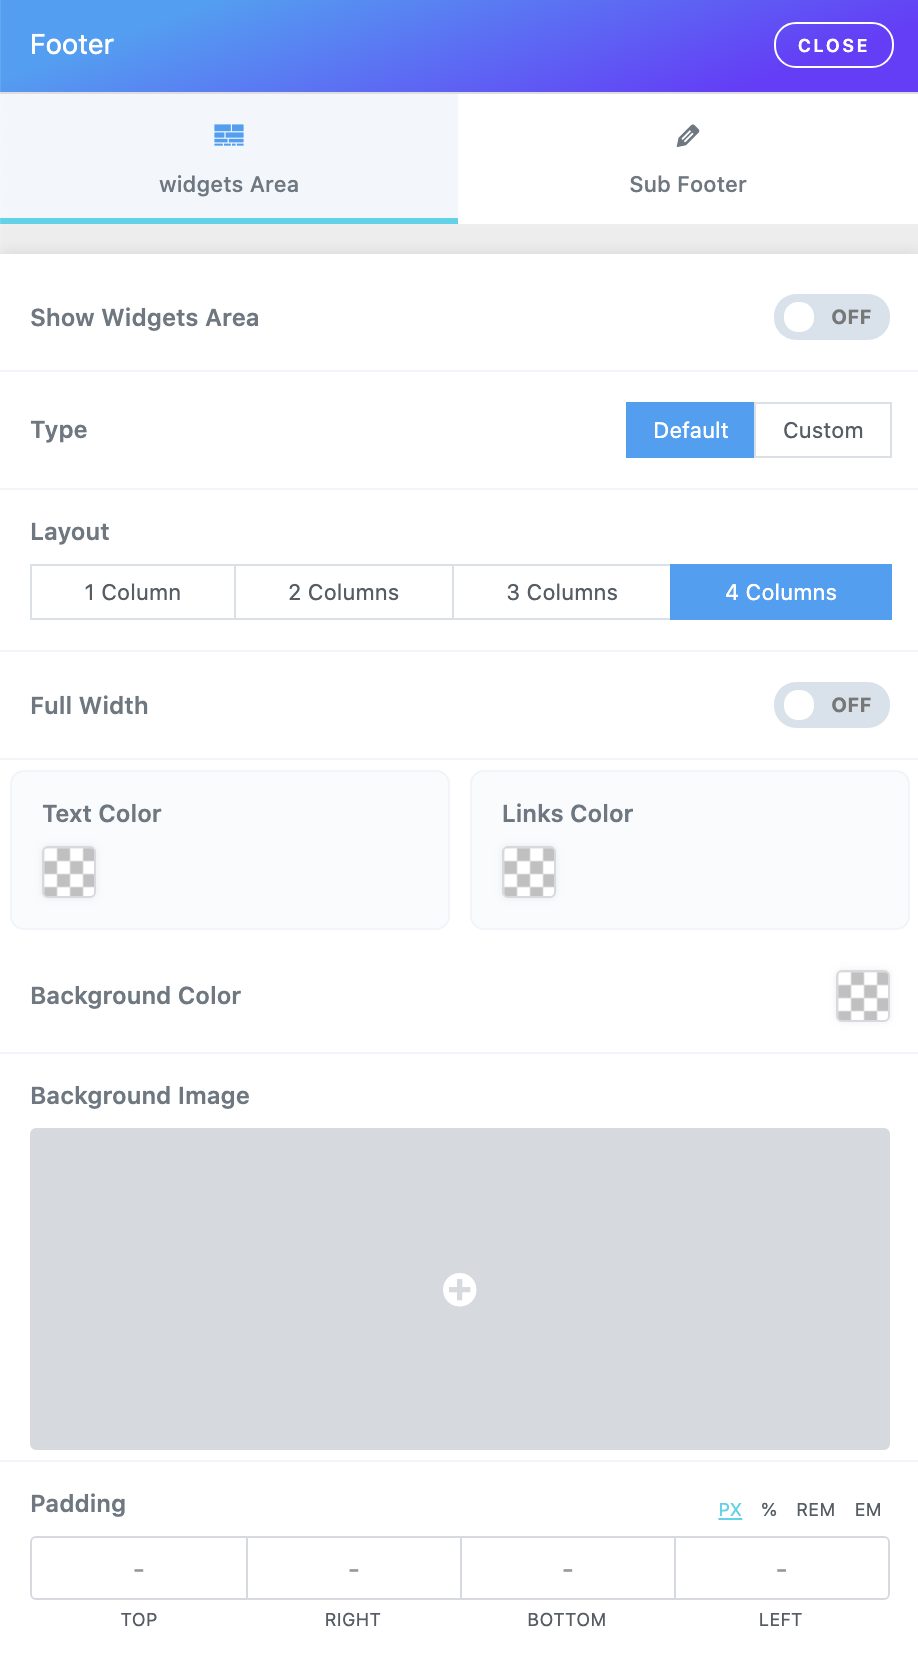
Footer / Widgets Area - #back to top
- Show Widgets Area: Show / Hide top footer widgets area.
- Type: Select the widgets area type Normal or from an Elementor template.
- Layout: 1,2,3 or 4 columns.
- Full Width: Boxed or full width widgets area.
- Text Color: Choose widgets area text color.
- Links Color: Choose widgets area links color.
- Background color: Choose widgets area custom background color.
- Background Image: Select an image to use for the widgets area background image.
- Padding: Set the widgets area inner spacings (padding).
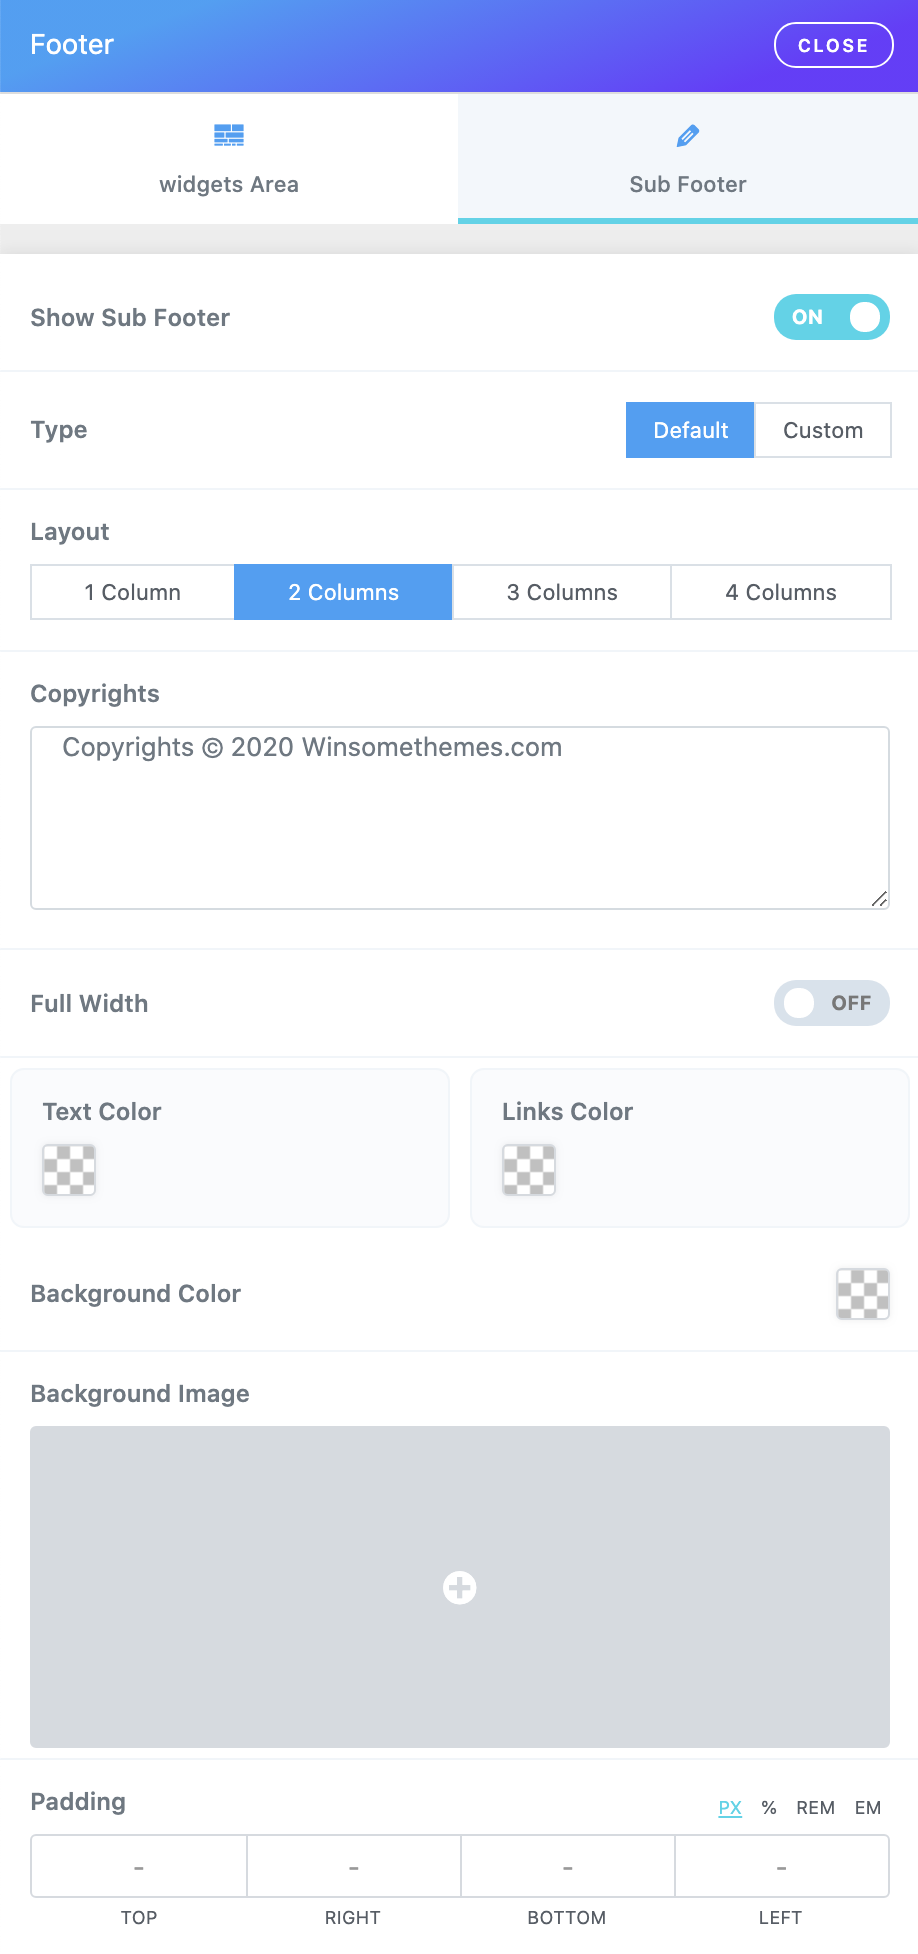
Footer / Sub Footer Area - #back to top
- Show Sub Footer Area: Show / Hide top sub footer area.
- Type: Select the sub footer area type Normal or from an Elementor template.
- Layout: 1,2,3 or 4 columns.
- Copyrights: Set the footer copyrights text.
- Full Width: Boxed or full width sub footer area.
- Text Color: Choose sub footer area text color.
- Links Color: Choose sub footer area links color.
- Background color: Choose sub footer area custom background color.
- Background Image: Select an image to use for the sub footer area background image.
- Padding: Set the sub footer area inner spacings (padding).
Typography - #back to top
- Body Typography: Set the body font size, weight, letter spacing, etc...
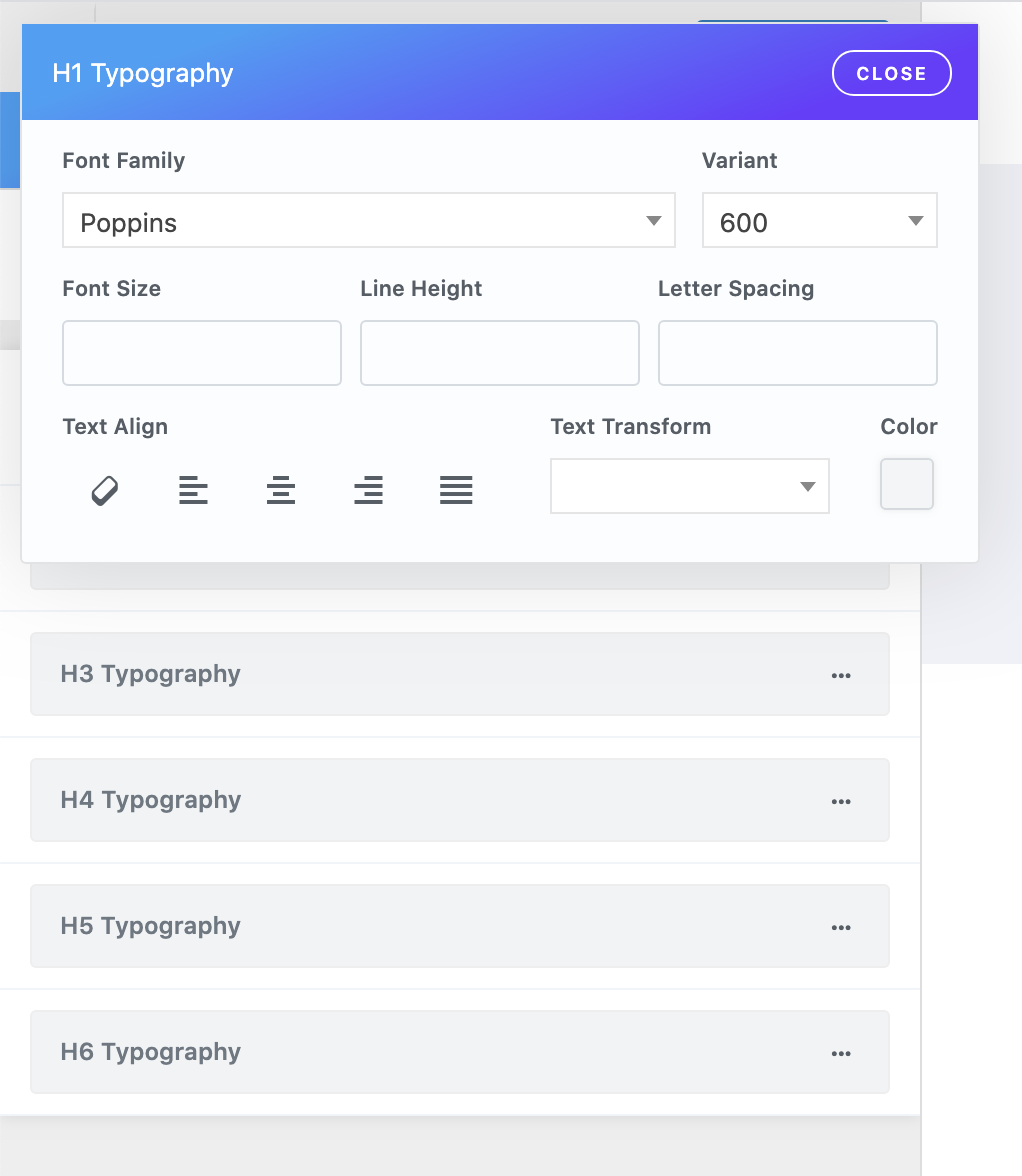
- Headings Typography: Set the h1,h2,h3,h4,h5 and h6 font size, weight, letter spacing, etc...
- Page Title Typography: Set the page title font size, weight, letter spacing, etc...

Blog Options / Archive - #back to top
- Blog Listing Style: Select your prefered blog posts listing style and they are:
- Classic.
- List.
- Grid.
- Masonry.
- Show Title: Show / Hide post title below the post media.
- Show Icon: Show / Hide post icon in the post meta.
- Show Date: Show / Hide post date.
- Show By Author: Show / Hide post author.
- Show Category: Show / Hide post categories.
- Show Media: Show / Hide post media (featured image or video or audio, etc...).
- Show Excerpt: Show / Hide post summary.
- Format this option will disable the default wordpress summary content.
- Show Read More: Show / Hide read more button.
- Excerpt Length: The text length that appears in the posts list description.
- Box Style: Options to style the blog listing box styles(BG color, padding, margin, etc...).
- Title: Options to style the blog listing Title styles(color, padding, margin, etc...)..
- Featured Image: Options to style the blog listing Featured Image styles (size, border, margin, etc...).
- Pager: We have 3 pager types (Numeric + Navigation pager and Older Newer page or Load more pager) with too many options to style.

Blog Options / Single - #back to top
- Show Media: Show / Hide post media (featured image or video or audio, etc...).
- Show Icon: Show / Hide post icon in the post meta.
- Show Category: Show / Hide post categories.
- Show Date: Show / Hide post date.
- Show Comments: Show / Hide post comments.
- Show Conent: Show / Hide post content.
- Show Tags: Show / Hide post tags.
- Show Nav: Show / Hide post Next & Previous links.
- Show Author Box: Show / Hide author box below the content.
- Show Related: this option will show / hide related posts.
- Show Socials: Show / Hide social media share post buttons.
- Boxs Style: Options to style the blog details boxes styles(BG color, padding, margin, etc...).
- Meta: Options to style the blog details Meta styles below the Media(color, padding, margin, etc...)..
- Post Content: Options to style the blog details content styles (size, border, margin, etc...).
- Social Share: Choose what sharing icons to show and select thier styles.

Portfolio / Archive - #back to top
- Style: Grid or Masonry layout.
- Layout: 1,2,3 or 4 columns.
- Item Style: Select from the 3 pre-defined styles.
- Portfolio Archive Sidebar: Left, Right or No Sidebar.

Portfolio / Single - #back to top
- Portfolio Archive Sidebar: Left, Right or No Sidebar.
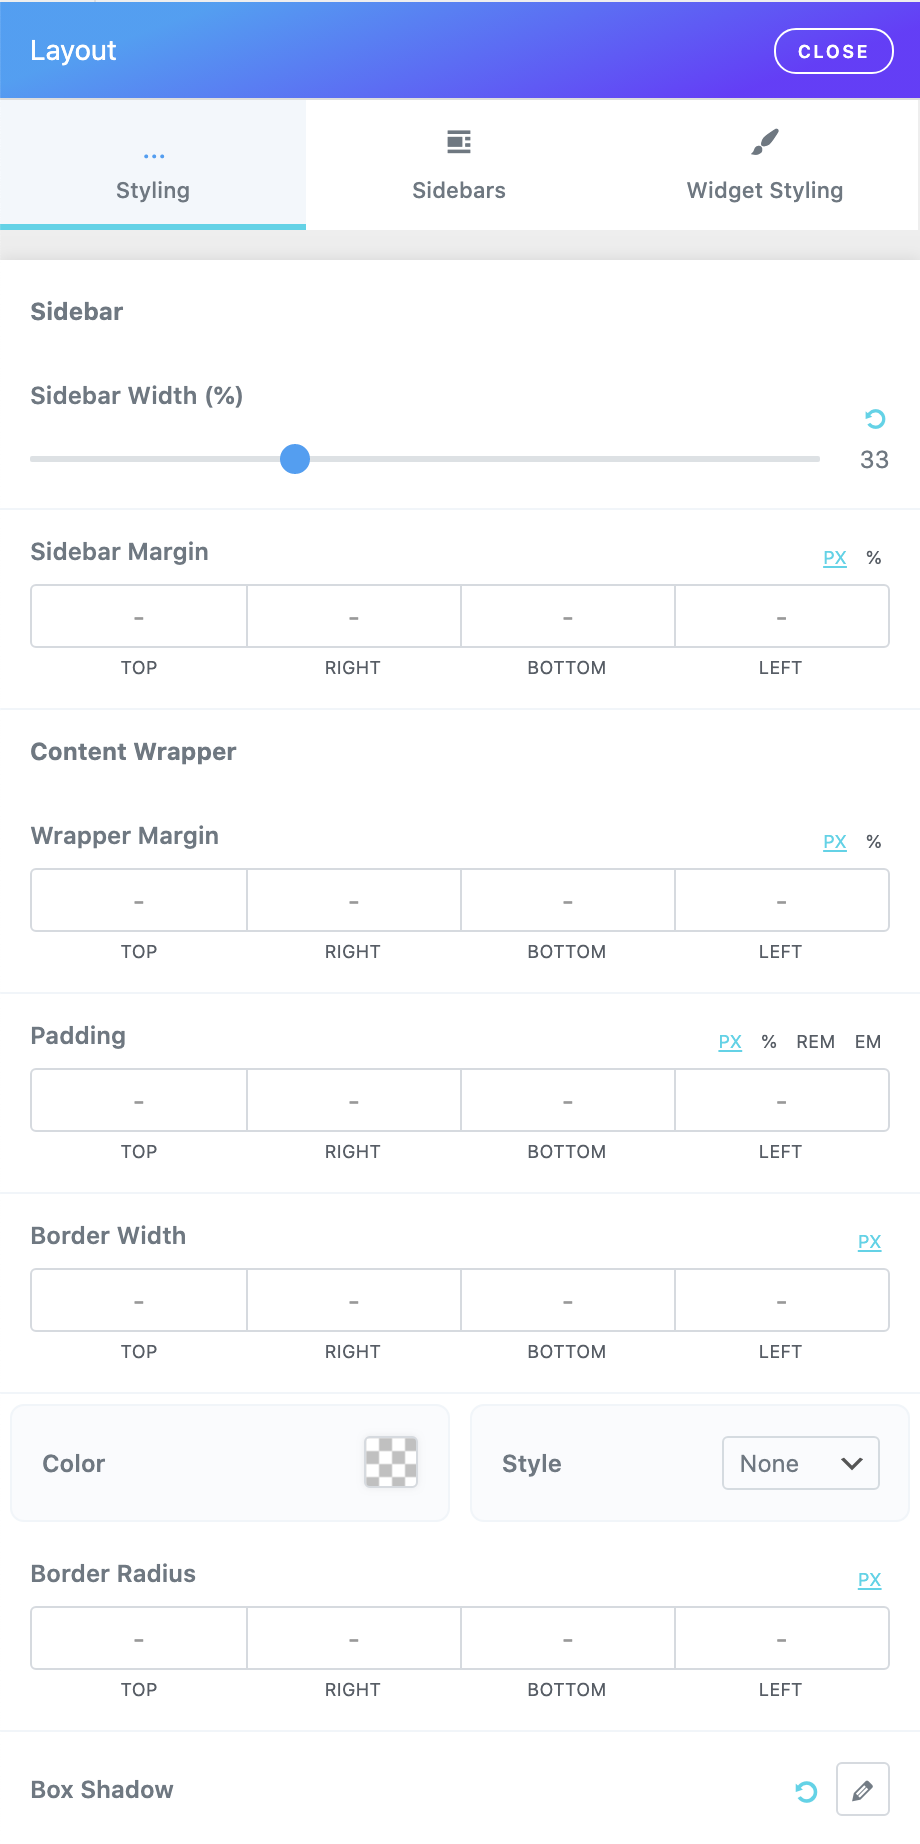
Layout / Styling - #back to top
- Sidebar Width (%): Choose the site sidebar width.
- Sidebar Margin: Set the sidebar outer spacings (margin).
- Wrapper Margin: Set the Content outer spacings (margin).
- Wrapper Padding: Set the Content inner spacings (padding).
- Border width: Set a border around the Content Wrapper.
- Border color: Set a border color from the color picker.
- Border style: Set a border style.
- Border Radius: Set a border radius for the Content Wrapper.
- Box Shadow: Set a box shadow for the Content Wrapper.
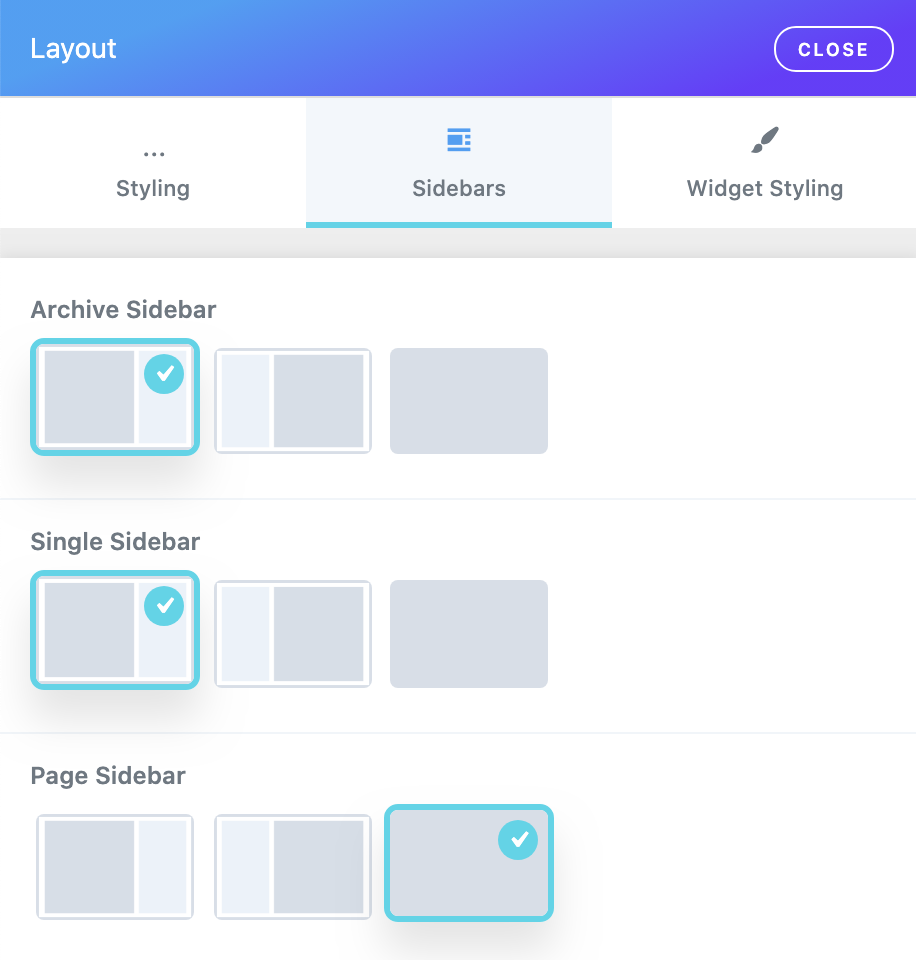
Layout / Sidebars - #back to top
- Archive Sidebar: Left, Right or No Sidebar for archive pages.
- Single Sidebar: Left, Right or No Sidebar for single pages.
- Page Sidebar: Left, Right or No Sidebar for pages from type page.
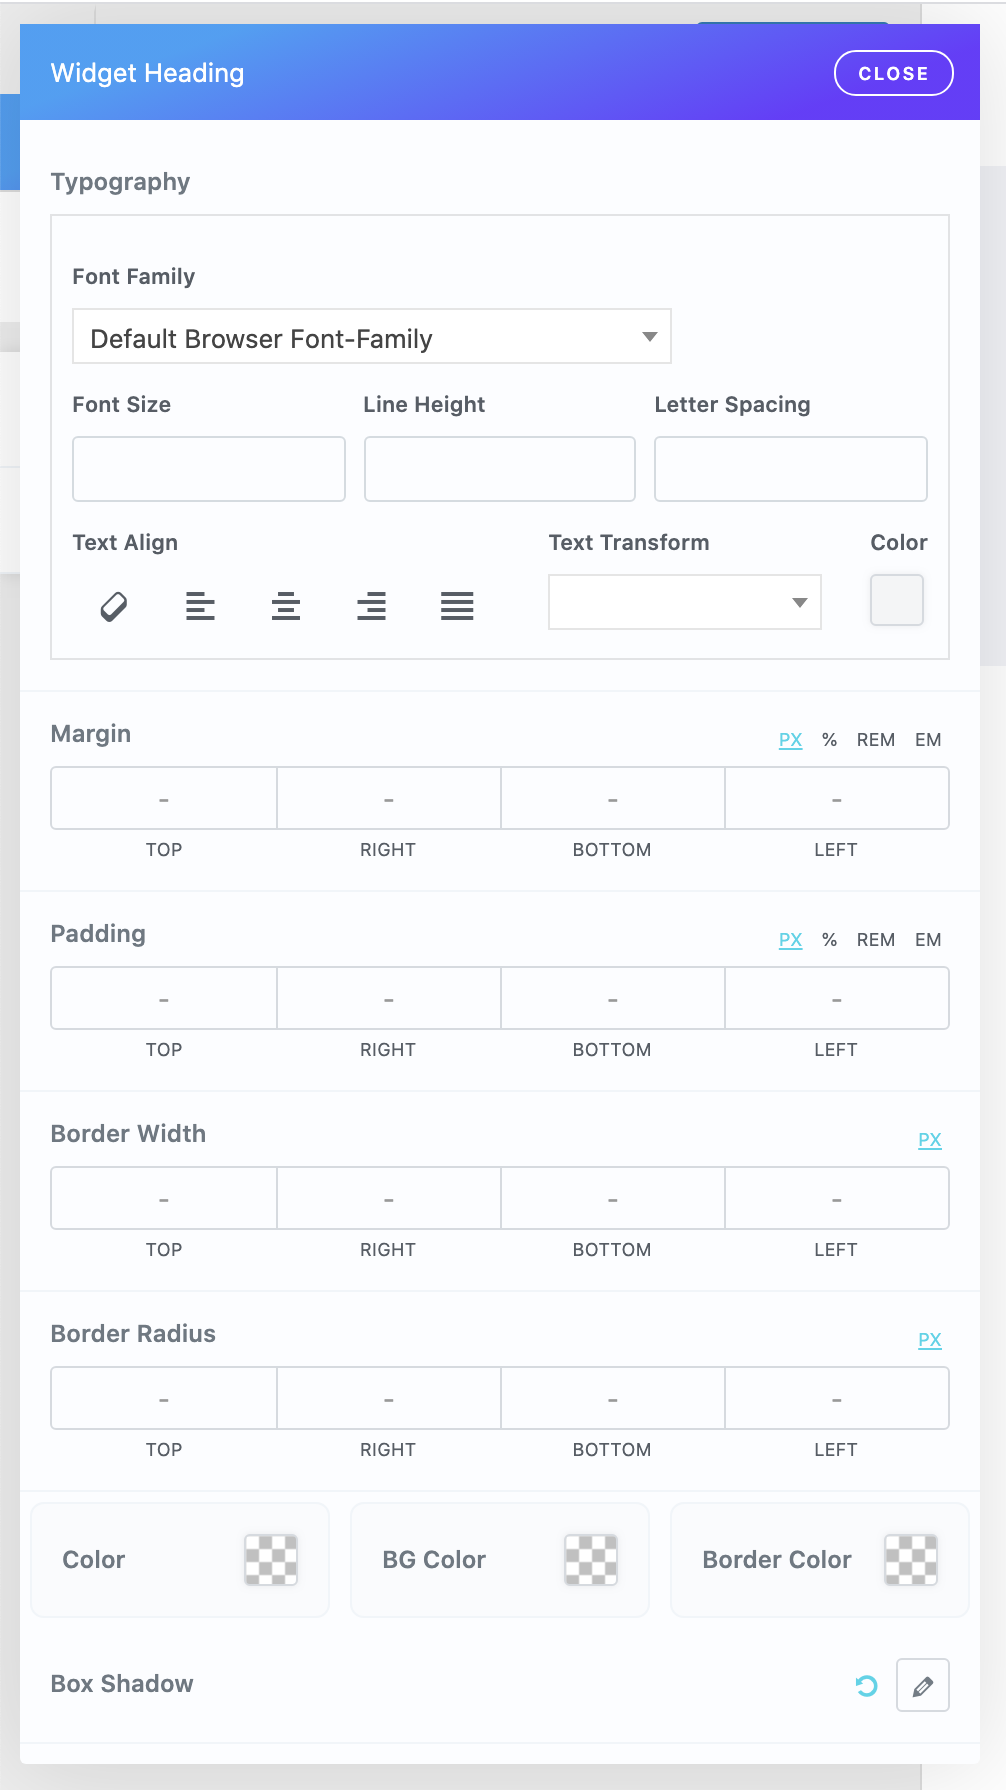
Layout / Widget Styling - #back to top
- Widget Heading and Widget Conent Styling:
- Typograpghy: Set the font size, weight, letter spacing, etc....
- Margin: Set the outer spacings (margin).
- Padding: Set the inner spacings (padding).
- Border width: Set a border width.
- Border color: Set a border color from the color picker.
- Border style: Set a border style.
- Border Radius: Set a border radius.
- Box Shadow: Set a box shadow.
Crust Menus #back to top
We aim to create the menu within our package to save the performance and make it easy to customize your menus with all needed styles and functionalities without installing any additional plugins as this will make your site speed more higher and will save a lot of time and efforts, so lets expand the magic and see what we offer in the menu options.
First of all you need to open your WP Dashboard > Appearance > Menus and see your menus there. If you didn't add any menus yet and don't know how to add menus you will need to check this video to learn how to add wordpress menus:
EVERY ITEM is having its own styling options and you can set custom option for each menu item individually.
After that you will need to check how the menus work, you can hover over any menu item and a button will show up to edit the menu property, a popup will open like this:
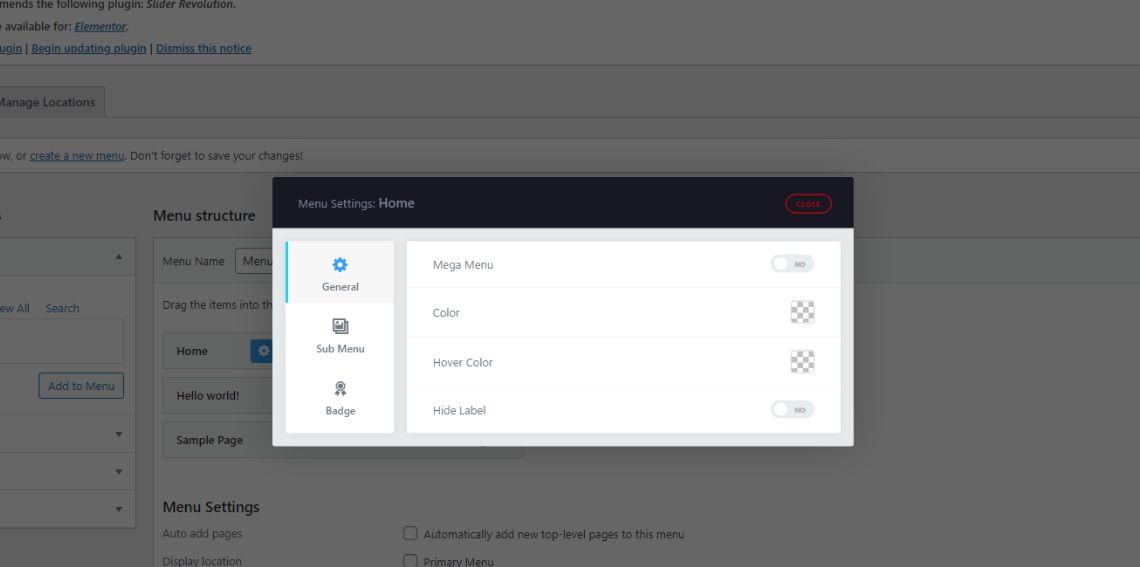
Crust Menu Styling.
Check out how to add mega menu and how to style it with your custom stylings in the following video:
Also you can customize your menu content and custom stylings in the following video:
Control Panel Settings #back to top
In the Control panel you will find some useful options you can use to control the theme more and more.
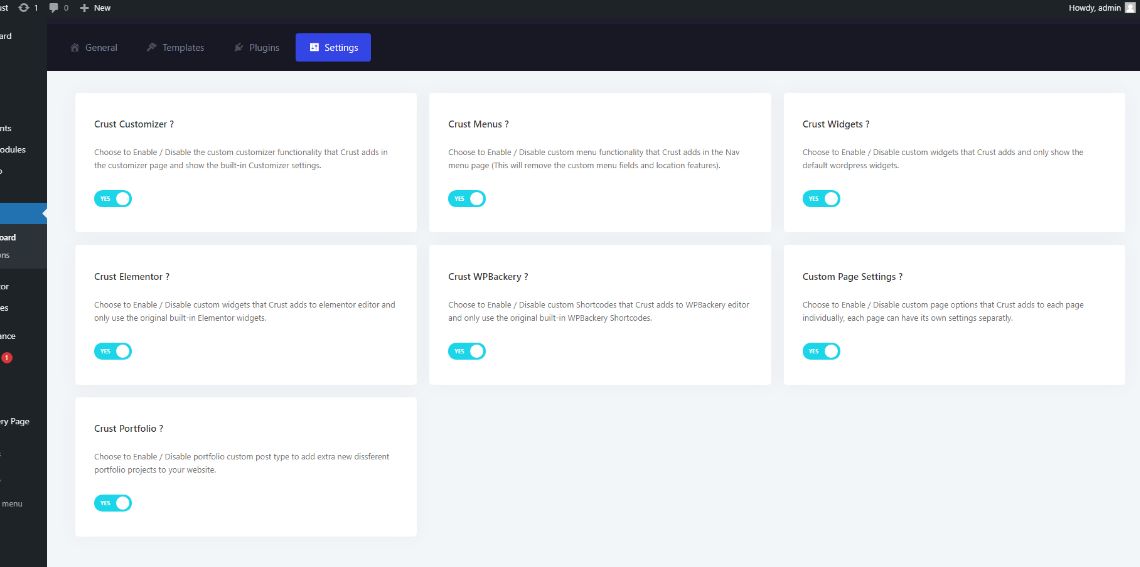
- Crust Customizer: Choose to disable the crust customizer if you need to add another customizer options to your site.
- Crust Menus: Choose to disable the crust Menus if you need to add another Menus plugins to your site.
- Crust Widgets: Choose to disable the crust Widgets if you don't need them anymore.
- Crust Elementor: Choose to disable the crust Elementor if you have another Elementor add-on plugin you need to use.
- Crust Page Settings: Choose to disable the crust Page Settings if you don't need them anymore.
- Crust Portfolio: Choose to disable the crust Portfolio if you have another portfolio plugin in your site.
Version History (Changelog) #back to top
You can check the version history and also the changelog on theme sale page and follow the changes made to the theme from the begining of the time.
Once again, thank you so much for purchasing our theme. As we said at the beginning, We'd be glad to help you if you have any questions relating to the theme. No guarantees, but We'll do our best to assist. If you have a more general question relating to the themes on winsomethemes, you might consider submit a ticket and we will always be there for help.
Changelog
                                ---------------------------------------------------------------------------------
                                Version 1.2.0 – 19 November 2021
                                ---------------------------------------------------------------------------------
                                == New: 6 Creative Unique demos.
                                == New: Search overlay style option.
                                == Update: Crust Core & Slider Revolution plugins.
                                == Fix: Some minor issue.
                                ---------------------------------------------------------------------------------
                                Version 1.1.1 – 26 October 2021
                                ---------------------------------------------------------------------------------
                                == Fix: Compatibility with Elementor Pro.
                                == Fix: Custom Header issues.
                                == Fix: Minor CSS issue.
                                ---------------------------------------------------------------------------------
                                Version 1.1.0 – 06 September 2021
                                ---------------------------------------------------------------------------------
                                == New: RTL Support.
                                == Update: Crust Core WP Plugin to version 1.0.4.
                                == Fix: Minor CSS issue.
                                ---------------------------------------------------------------------------------
                                Version 1.0.1 – 08 August 2021
                                ---------------------------------------------------------------------------------
                                == New: 2 New Demos ( Modern & SEO ).
                                == Update: Slider Revolution WP Plugin.
                                == Update: Crust Core WP Plugin to version 1.0.2.
                                == Fix: One page navigation issues in iframes.
                                == Fix: import demo templates links issue.
                                ---------------------------------------------------------------------------------
                                Version 1.0.0 – 04 August 2021
                                ---------------------------------------------------------------------------------
                                == Initial Release.
Copyright and license #back to top
- Swiper - The Most Modern Mobile Touch Slider
- Font Awesome Icons
- UIcons - Flaticons
- jquery js-socials plugin
- Page scroll to id
- Isotope Filtrable jquery portfolio
- imagesloaded jQuery Plugin
- jQuery One Page Nav Plugin
- The Final Countdown for jQuery
- Flickr Feed
- Bakground Images from freepik.com, unsplash.com, pexels.com under Creative Commons Public Domain License